Documentation

The Complete Mawaeed Guide

Everything you can do with Mawaeed and exactly how to do it, from your first login to multi-branch teams, group classes, memberships with included hours, getting paid and approving transfers, recurring bookings, table reservations, car rentals and guesthouse stays. Written for business owners, not developers.

Getting started

From zero to a live booking page in about five minutes.

1

Create your account

Sign up with your email and a password, then confirm your email from the branded link we send you. Once verified you land straight in the setup wizard. No payment details needed to start.
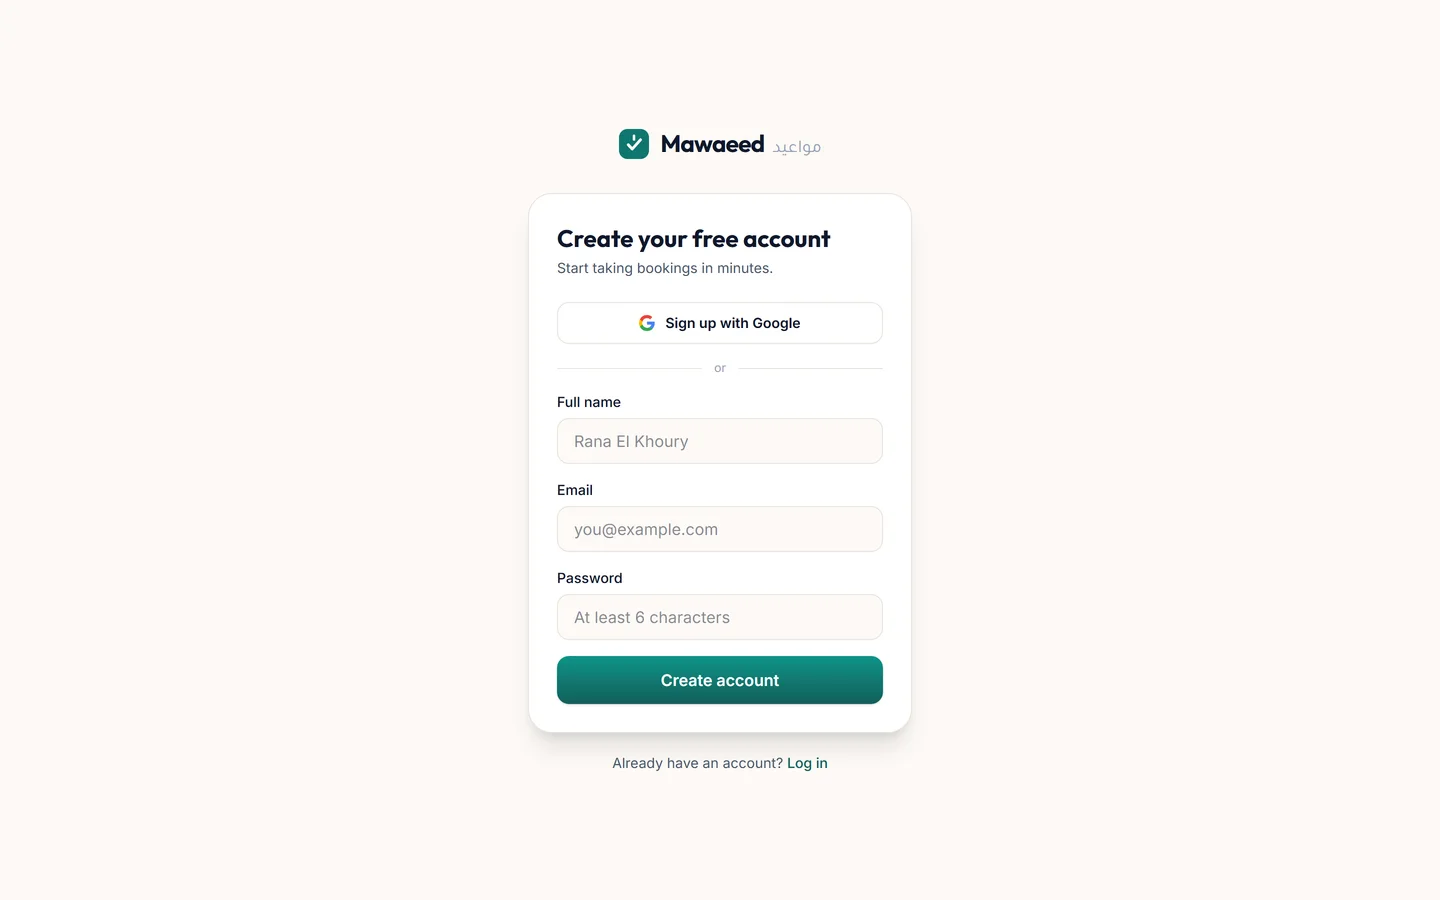
The Mawaeed signup page

Tips

  • Check spam if the confirmation email doesn't arrive within a minute
  • Use the email you actually read: booking alerts go there too
2

Set up with the onboarding wizard

Pick your industry (salons, barbers, padel courts, clinics, restaurants, car rental, guesthouses and a dozen more), name your business, add your WhatsApp and city, list a few services with prices, set your weekly hours and how you get paid. Along the way you can preview each template live, add photos, FAQs and even pull your real Google reviews, and studios and gyms get a step to set up membership plans. Publish, and your page is live at your-name.mawaeed.io with a professionally designed template for your industry, with real images, sections and copy included.

Tips

  • Everything you enter here is editable later, so don't overthink it
  • The industry you pick decides your starter template AND how booking works (appointments, table reservations, or rentals)
  • Your headline uses the tagline you write, so it sounds like you from the first second
3

Meet your dashboard

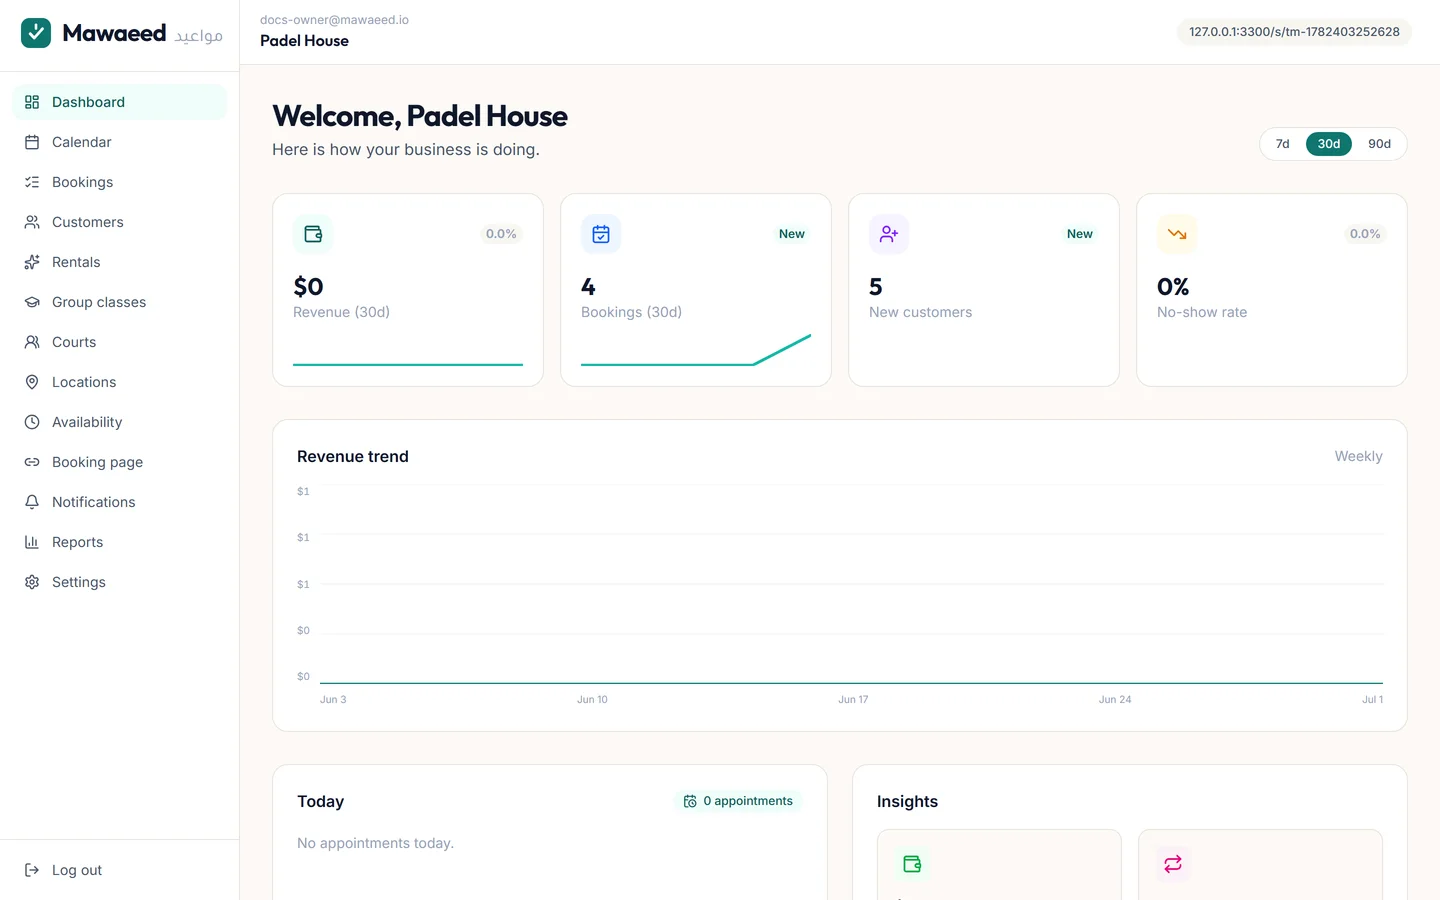
The dashboard is your daily home: revenue and booking KPIs for the last 7/30/90 days, the revenue trend, today's appointments, and insights. Everything you manage lives in the left menu: calendar, bookings, customers, services, classes, staff, locations, your booking page, notifications, reports and settings.

The Mawaeed operator dashboard with KPIs and revenue trend
4

Your live booking page

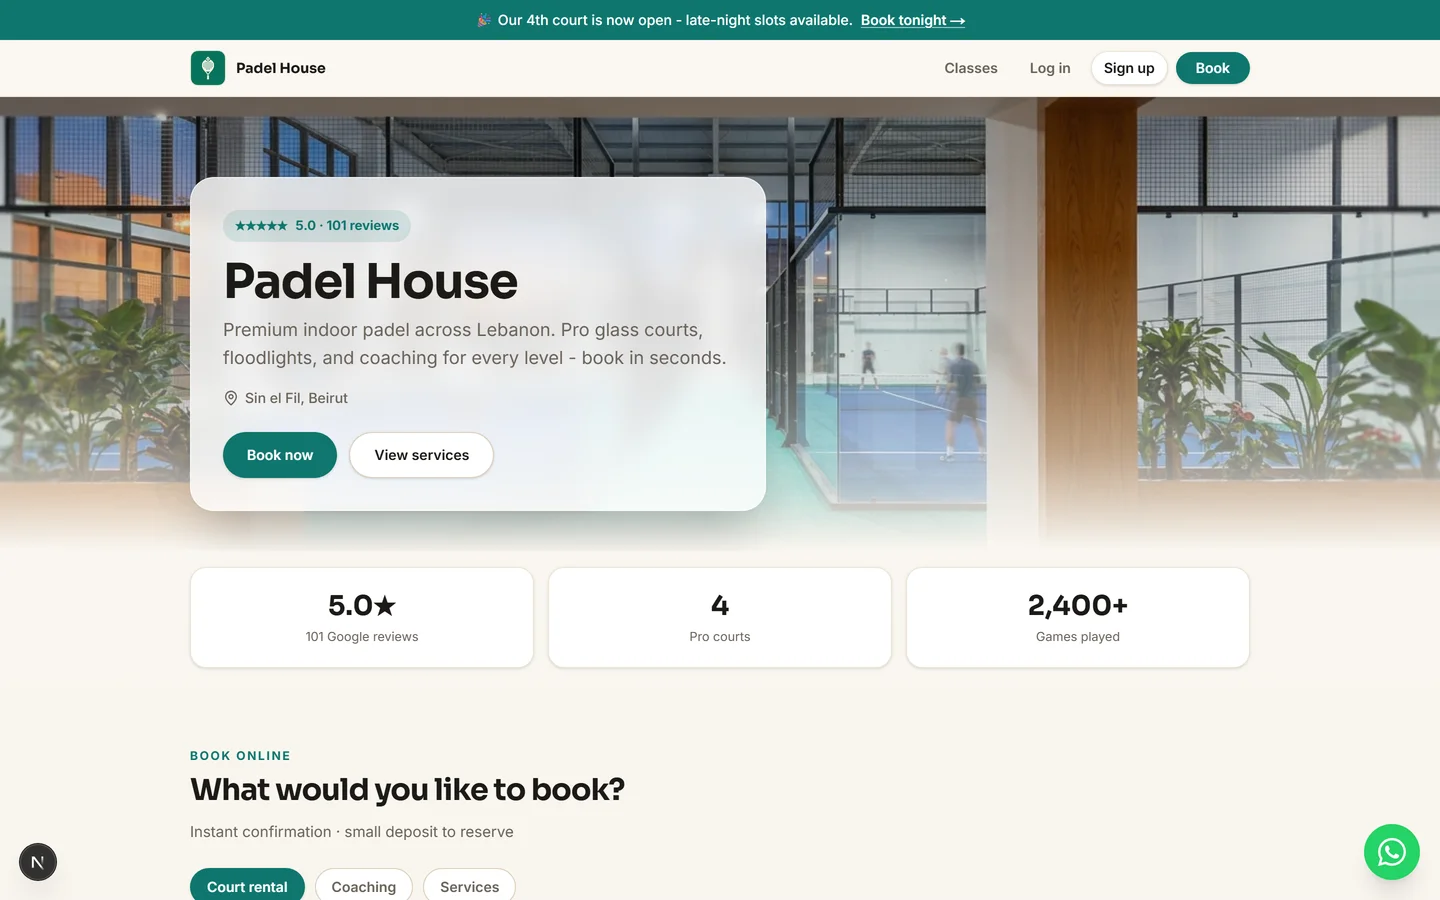
Customers see a fast, polished site with your branding: hero, services with Book buttons, packages, team, gallery, reviews, FAQ, locations and a floating WhatsApp button. Share the link everywhere: Instagram bio, WhatsApp status, Google Business profile.

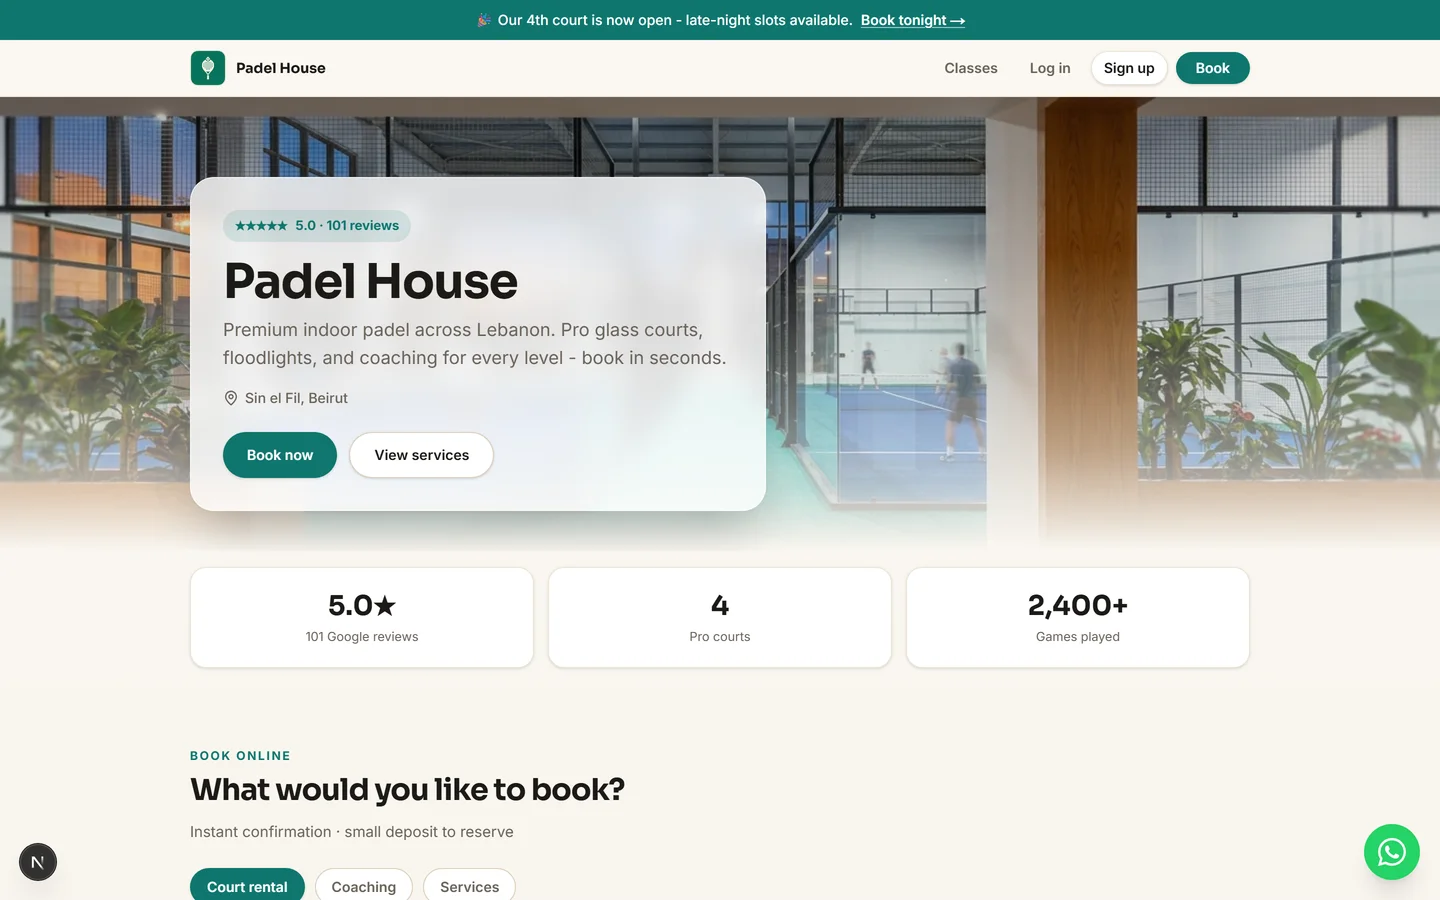
A live Mawaeed booking page (Padel House demo)

Tips

  • The "View page" button in the dashboard always opens your live site
  • Booking works instantly, so try a test booking yourself from your phone

Design your page

The Studio editor gives you full control over how your page looks: no code, live preview.

1

Open the Studio editor

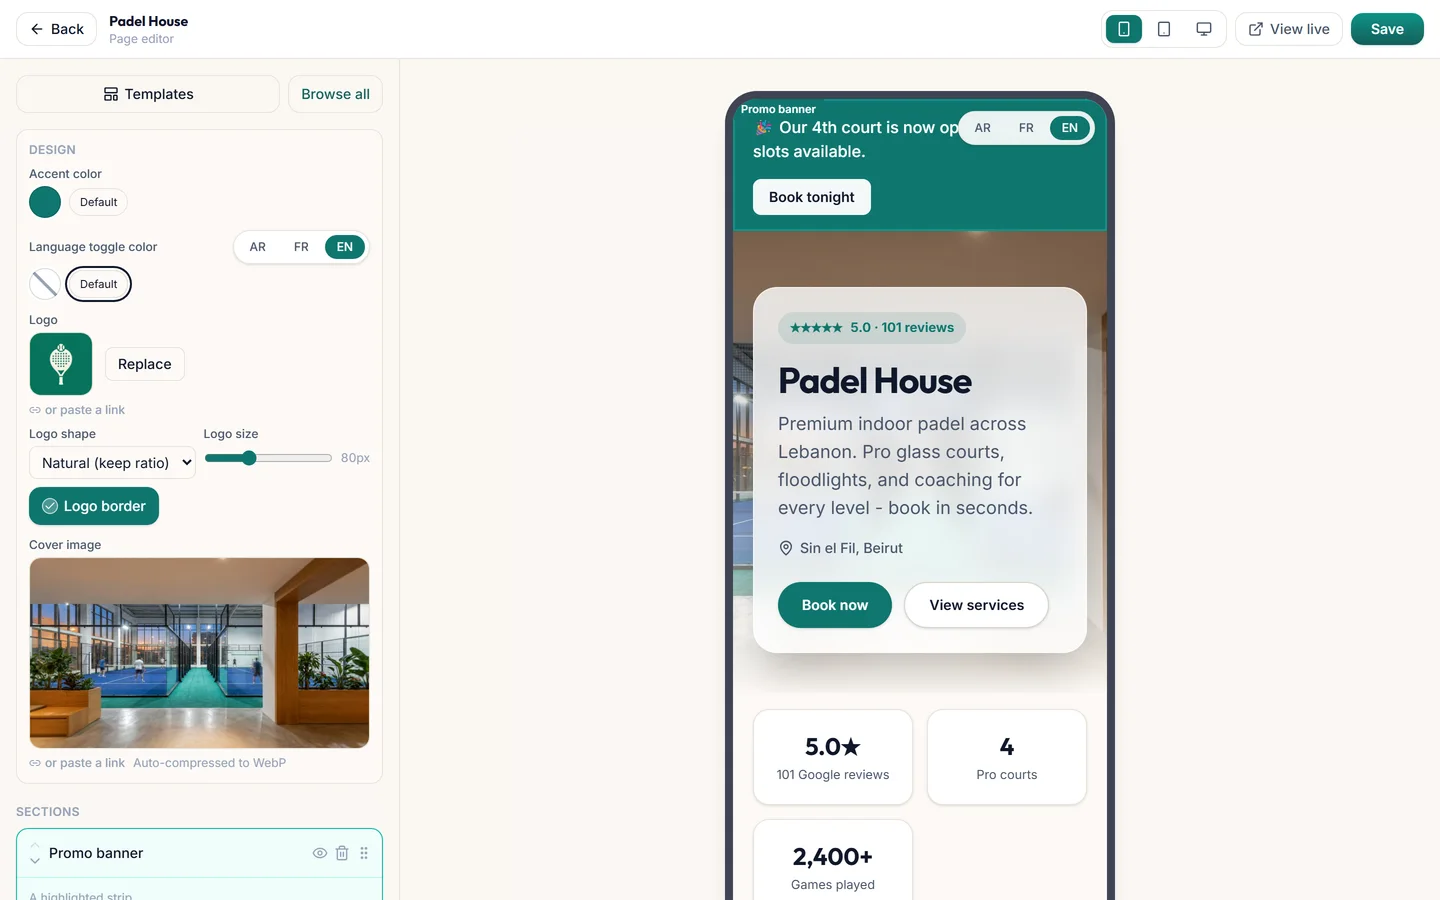
Booking page → Edit (or /studio) opens the editor: your page's sections listed on the left, a live preview on the right. Add, hide, reorder and edit any section and watch the preview update as you type. It's desktop-only, so you can design comfortably on a big screen.

The Studio editor with section list and live preview
2

Switch templates

Every industry ships with three designed layouts: Classic (rich landing page), Split (modern split hero) and Editorial (centered, type-led). Apply any of them from the Templates tab; your services, prices and hours stay untouched, only the design changes.

Tips

  • Applying a template replaces your section arrangement. Your business data is never touched
3

Edit sections and pick variants

Each section has multiple layouts you can switch between: 4 hero styles, 7 service layouts (cards, tabs by category, grouped lists, category cards, a photo showcase…), 3 gallery styles including an auto-sliding strip, 3 team styles, carousel or grid reviews, and more. Every section takes an eyebrow, heading and subtitle, and the About section supports amenity chips (emoji welcome: 🚿 🅿️ ❄️).

Service categories shown as tabs on the booking page
4

Brand it

Set your accent color and it flows through the whole page: buttons, links, section highlights, the booking modal. Upload your logo (square badge or natural shape), choose the cover image, and tune per-section button colors when you want something special.

5

Announcements and extras

Add a Banner section and it renders as a full-width announcement bar above your header ("🎉 Our 4th court is now open. Book tonight →"). Other high-impact extras: the Instagram grid, team bios, an FAQ with your real policies, and customer reviews. Already on Google? Paste your Maps link and import your real Google reviews straight into the reviews section, ratings and all.

Tips

  • The announcement CTA opens the booking modal directly
  • Keep 5-7 sections for the best first impression. You can always add more
  • Imported reviews are real and editable, so trim or reorder them however you like

Services, staff & branches

What can be booked, who provides it, where, and when.

1

Manage your services

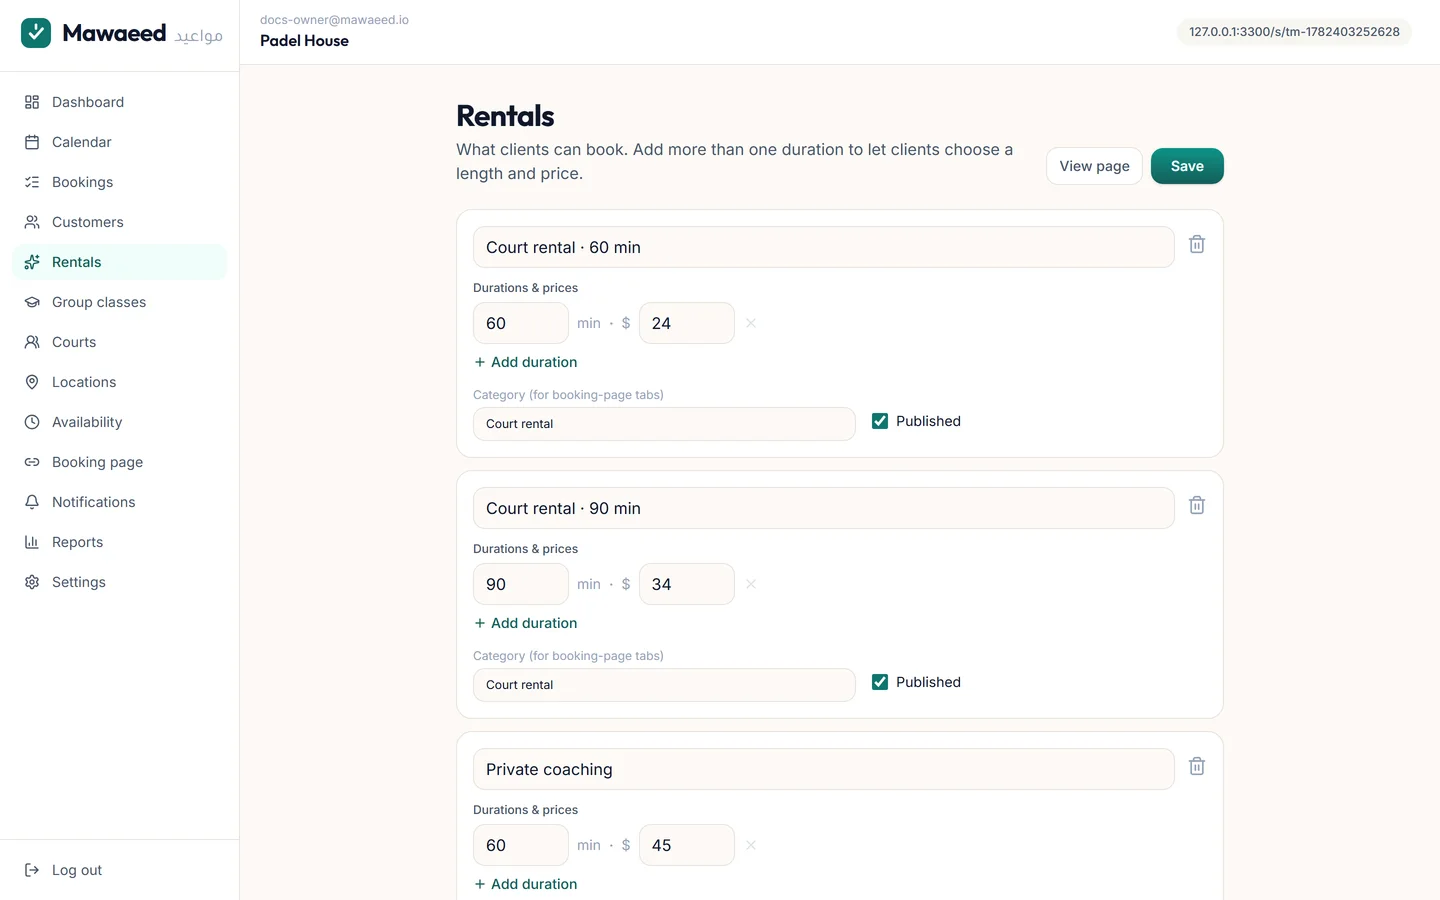
Services is the menu customers book from: name, one or more durations with prices, an optional category, a photo, and a Published toggle. Categories power the fancy service layouts: tabs, grouped lists and category cards group by them automatically. Add a photo per service and the showcase layout turns your menu into photo cards, perfect for rooms, cars and courts.

The services editor with durations and categories
2

Offer multiple durations

One service can have several lengths at different prices: a massage at 30/60/90 minutes, a court for 60 or 90. Click "Add duration" on any service. Customers get a "How long?" choice when booking, and the calendar automatically offers correctly-sized slots for the length they picked.

Tips

  • The first duration is the default shown on your page
  • Deposits computed as a percentage follow the chosen option's price
3

Add your team

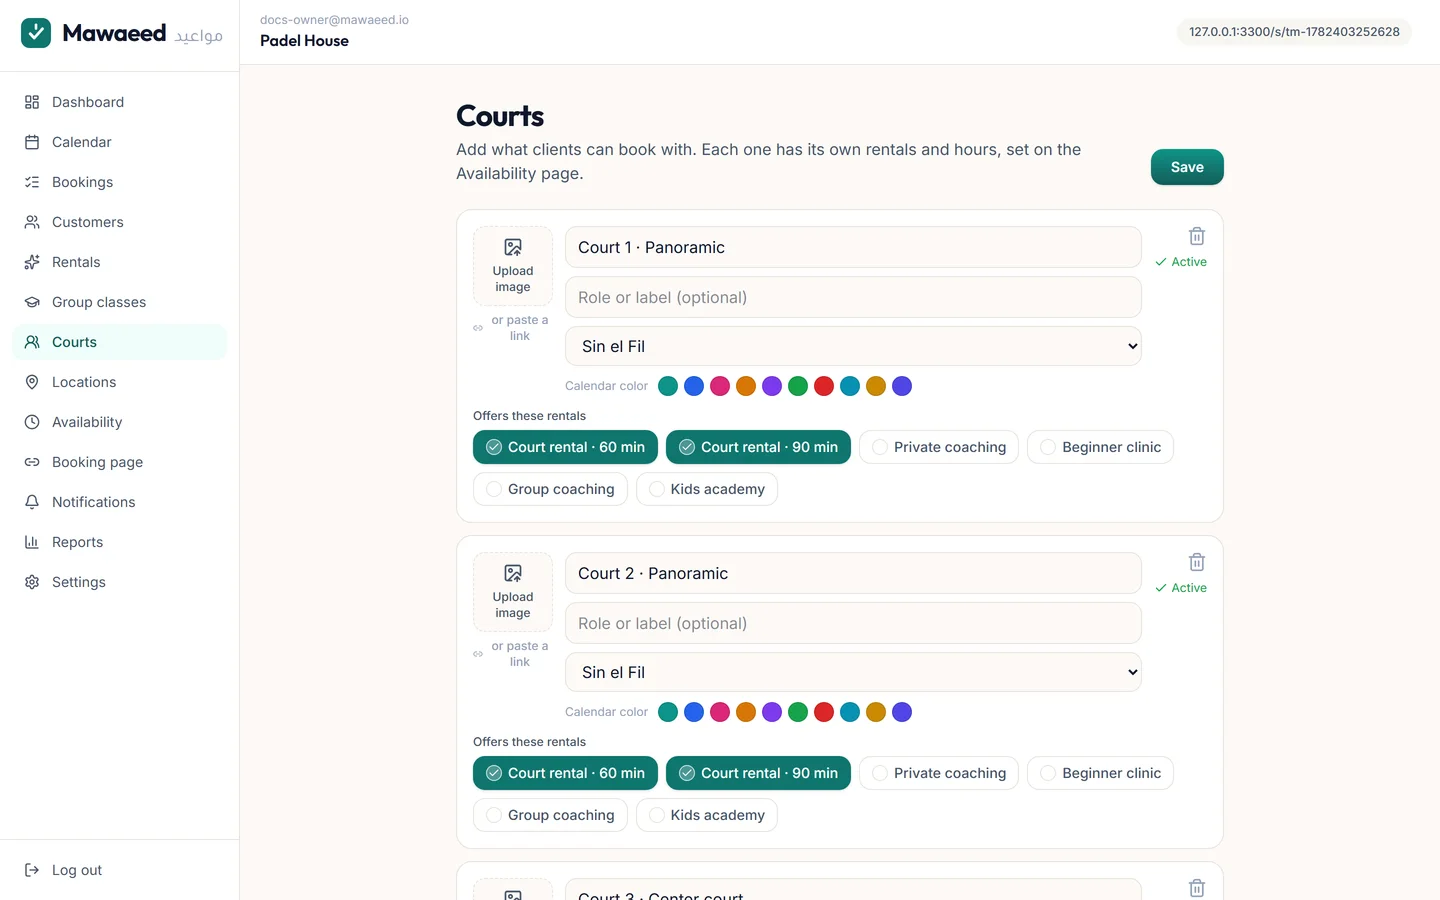
Staff hold the calendars: every staff member (or court, chair, bay: whatever your "resource" is) gets their own bookings, calendar color, photo, and the list of services they perform. Customers who book "any available" are placed automatically with whoever is free.

The staff manager with services and locations per member
4

Run multiple branches

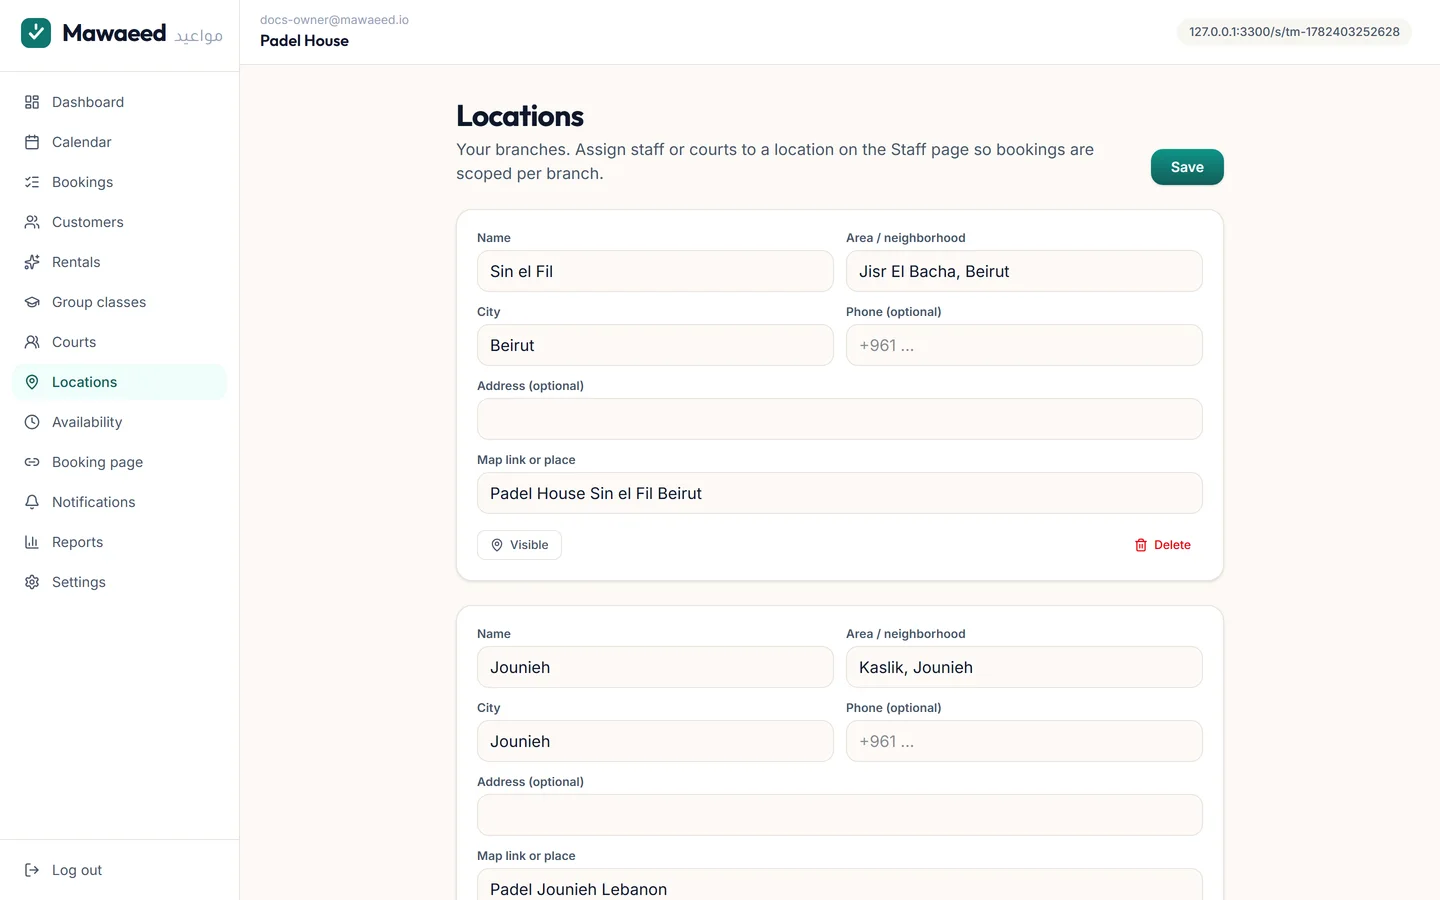
Add your locations under Locations (name, area, map link, phone) and assign each staff member or court to a branch on the Staff page. Customers pick their branch in the booking modal and only see times that branch can actually serve. A Locations section on your page shows each branch with its own map and Book button.

The locations manager with branches
5

Set weekly availability

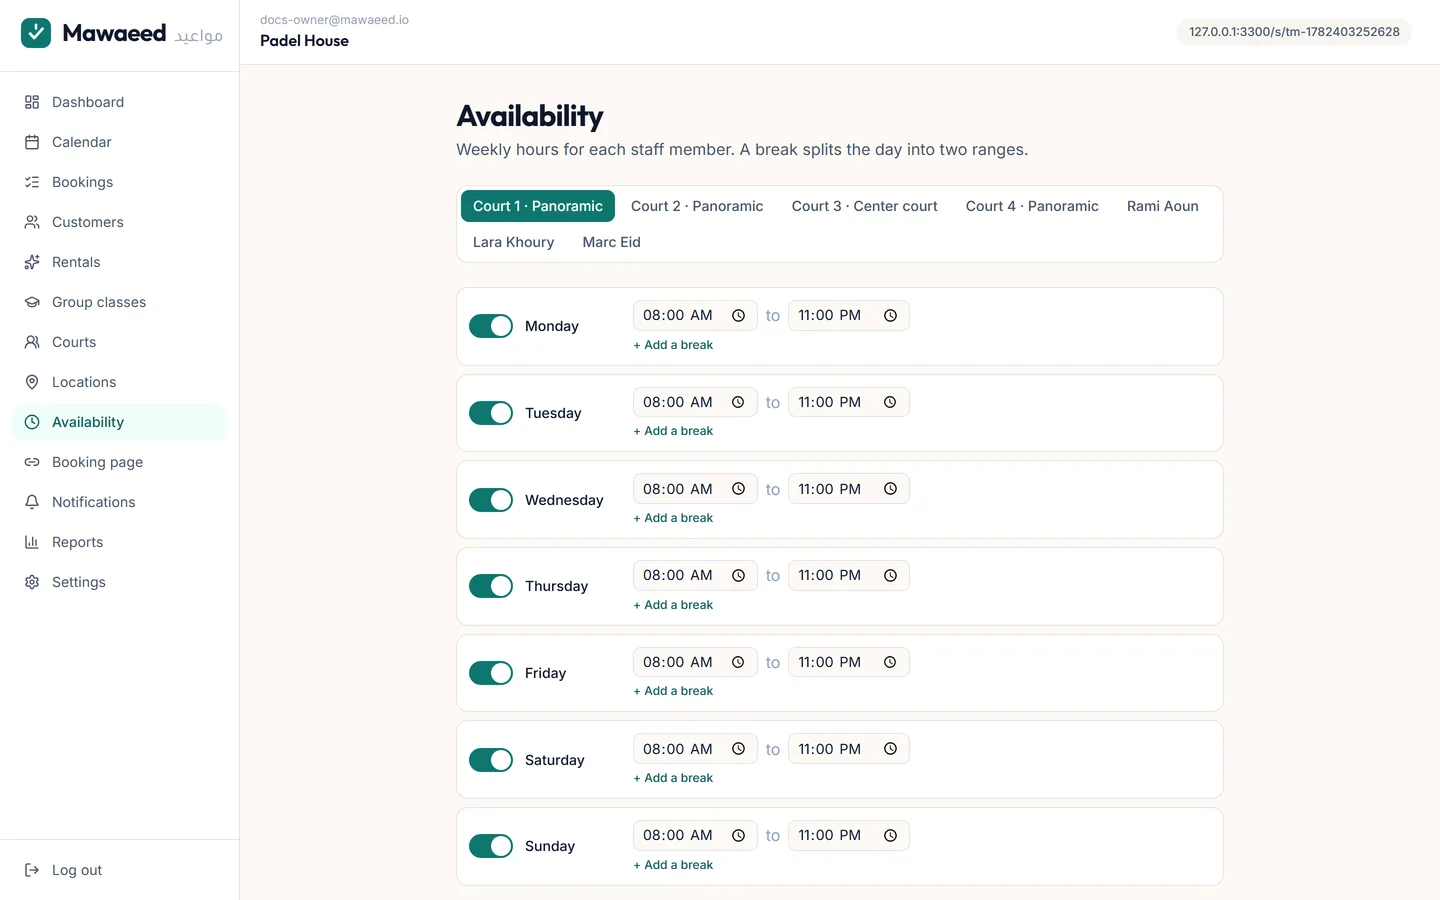
Availability defines the bookable hours per staff member, including split shifts (morning + evening with a lunch break). Add exceptions for holidays and time off; those days simply stop offering slots. Set one day up exactly the way you want it, then hit "Copy to..." on that day, tick the other days (or All) and press Apply: the whole pattern, shifts, breaks and branch, lands on all of them at once.

The weekly availability editor

Tips

  • Copy to... saves setting up six near-identical days by hand
  • Break times are shown in the same clock format as the time pickers next to them, so 1pm reads as 1pm
6

Choose which days a service runs

Some things you only offer on certain days: a coach who teaches Saturdays, a class that runs midweek, a treatment your specialist does on Tuesdays. Open Services and use the "Available on" day chips under any service to pick its days. Leave all seven switched on and nothing changes for you. Switch some off and your booking page greys those days out on the calendar, so a client cannot pick a Sunday for something you do not do on Sundays.

The services editor with the Available on day chips

Tips

  • Availability answers "when am I open", this answers "which days is this service offered". A bookable time has to pass both
  • You can still add a booking yourself on an off day. Walk-ins are your call, not the calendar's

Bookings & calendar

Where appointments live: the list, the calendar, walk-ins, and the automatic reminders that kill no-shows.

1

The bookings list

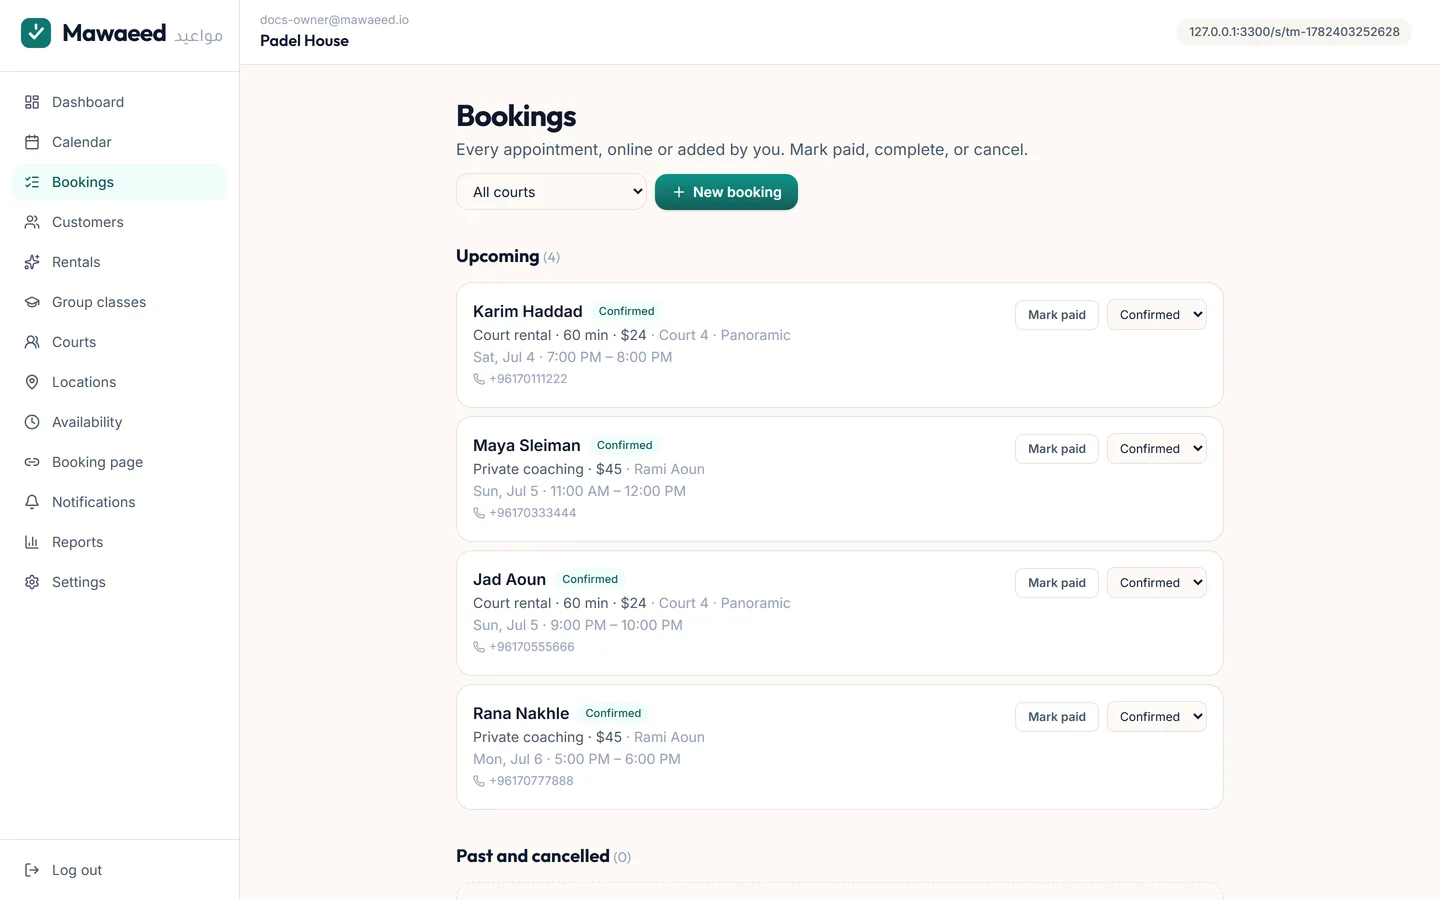
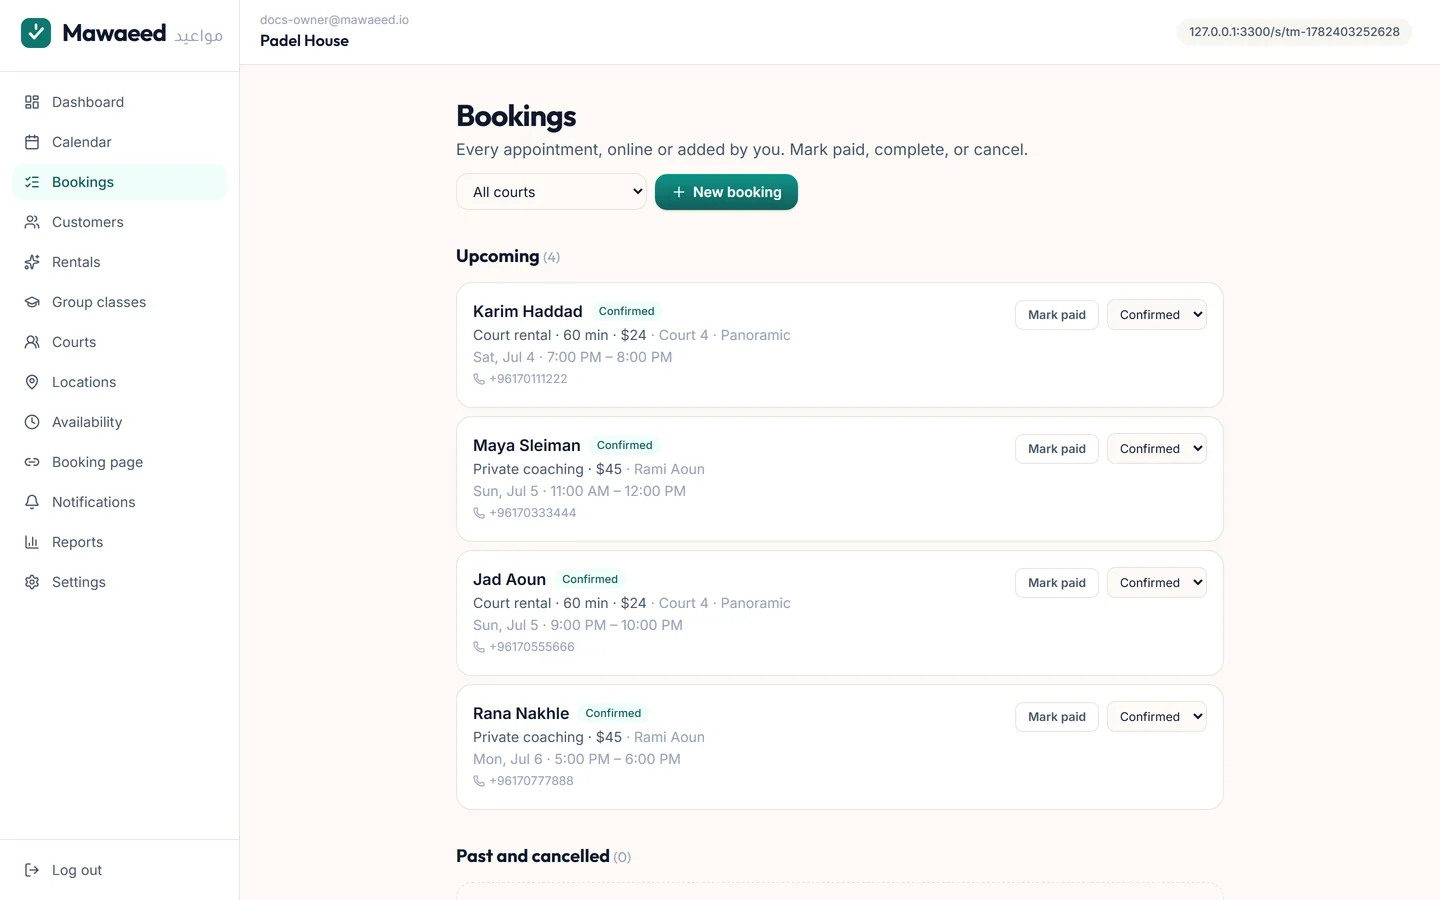
Every booking with its status (confirmed, completed, cancelled, no-show), searchable and filterable. Open any booking to see the customer, service, price and notes, mark it paid or completed, or cancel it.

The bookings list with statuses
2

Add bookings yourself

Phone call? Walk-in? Hit "New booking", pick the service, staff, date and time, and type the client's name, or attach an existing customer from the directory. Operator bookings can bend the rules (book outside notice windows) because you know your business.

The operator new-booking modal
3

Live calendar + Google Calendar sync

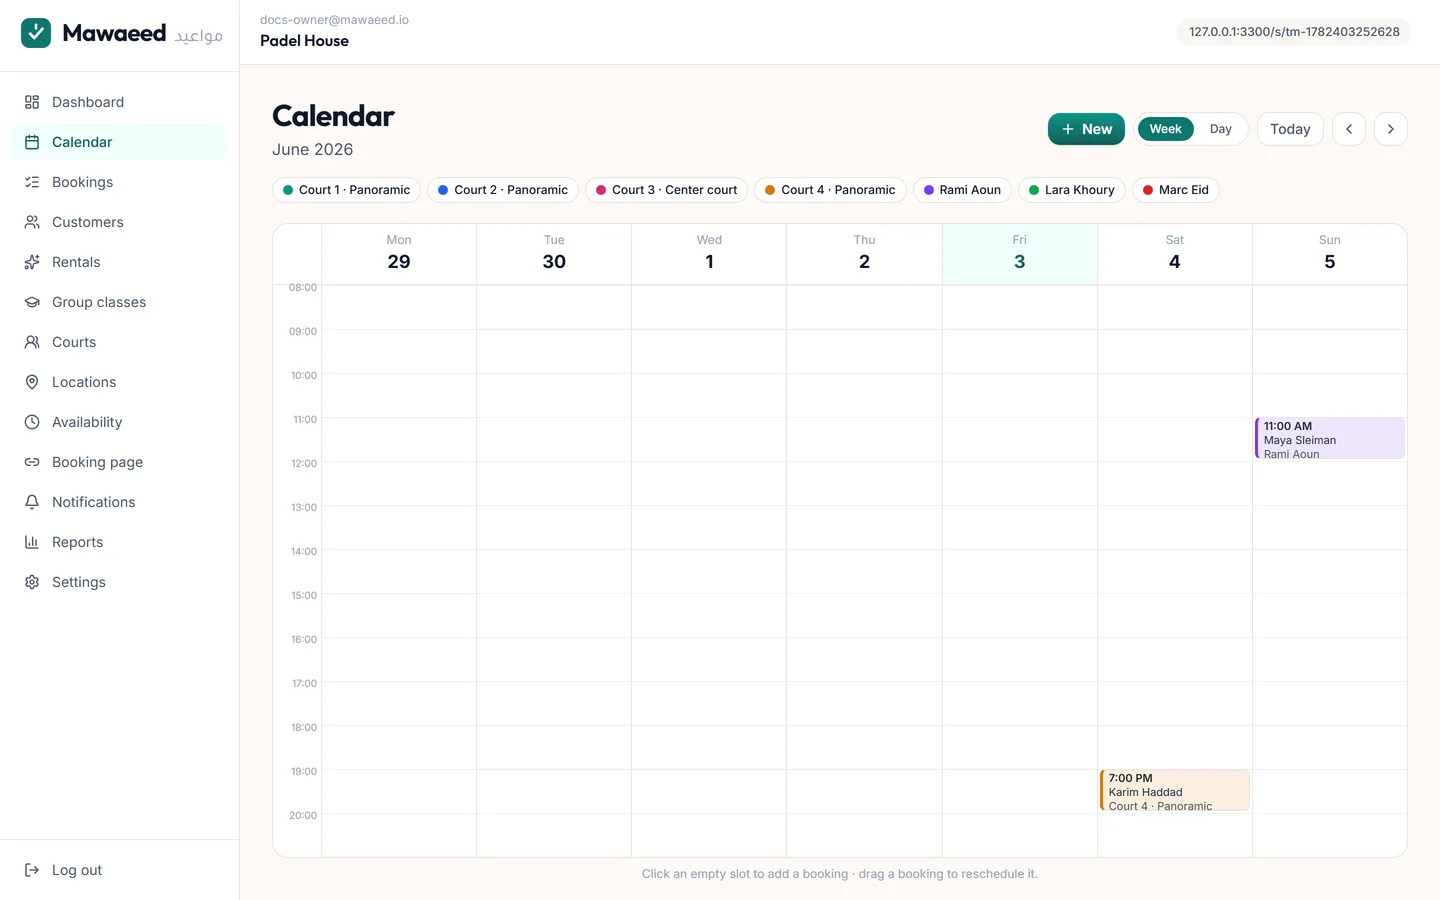
The calendar shows everyone's day and week, color-coded per staff member. Connect Google or Microsoft under Settings and every booking is pushed to the staff calendar automatically: created, rescheduled and cancelled.

The calendar with color-coded staff bookings
4

How customers book

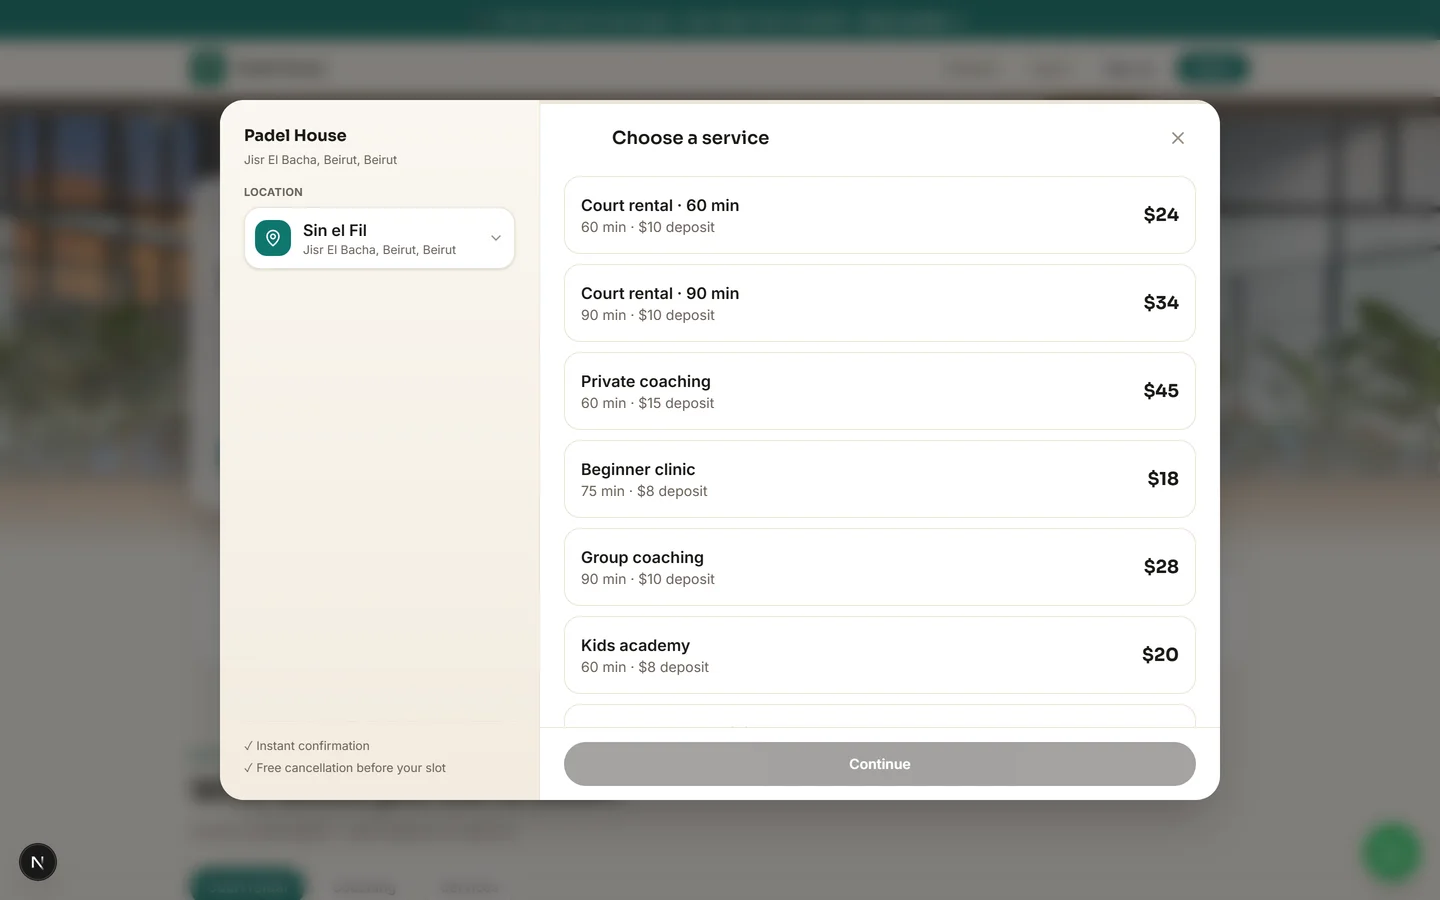
Any Book button opens a fast modal: pick a service (and length), a day and time, enter name + WhatsApp, confirm. Deposits you configure are shown upfront. The confirmation carries a manage link where clients can cancel or reschedule themselves within your rules.

The customer booking modal on a live page
5

Decide how you get paid

Settings → Payments is one decision, made once: No upfront payment (clients just book and you collect at the venue), Deposit (%) (a percentage holds the booking), or Full amount (they pay the whole price to confirm). Underneath, tick the methods clients may use: Cash, Whish, or both. Switching upfront payment off removes deposits from your page everywhere at once, so you can turn it off for a quiet month and back on later without editing your services one by one.

Settings with the payment choice and accepted methods

Tips

  • Whish needs your payout number and account name filled in before you can tick it
  • Cash is always offered, so a client who does not use Whish is never stuck
6

Paying before the booking is confirmed

When Whish is part of the booking, the client sees your Whish details and the exact amount on the review step, with copy buttons and an Open Whish shortcut that jumps straight into the app on both iPhone and Android. The Confirm button only wakes up once they tick "I sent the payment", so nobody walks away with a held slot without at least claiming to have paid. The booking reaches you with a note saying the client confirmed sending it, and you check your own Whish app as usual.

Tips

  • This is still a trust model: Mawaeed never touches your money and cannot verify a transfer, so always confirm receipt yourself
  • Clients who choose Cash skip the panel entirely and just book
7

Remove a test booking for good

Cancelling keeps a booking in your history, which is exactly what you want for real life. For the test bookings you made while setting up, open the booking and use Delete at the end of the action row. It asks you once, then the booking is gone for good along with any reminder that had not been sent yet, and a metered month gets the slot back.

Tips

  • Cancel for real bookings, Delete for your own test junk. A deleted booking cannot be recovered
  • Deleting also clears it from your calendar, so your week stops looking busier than it is
8

Automatic reminders

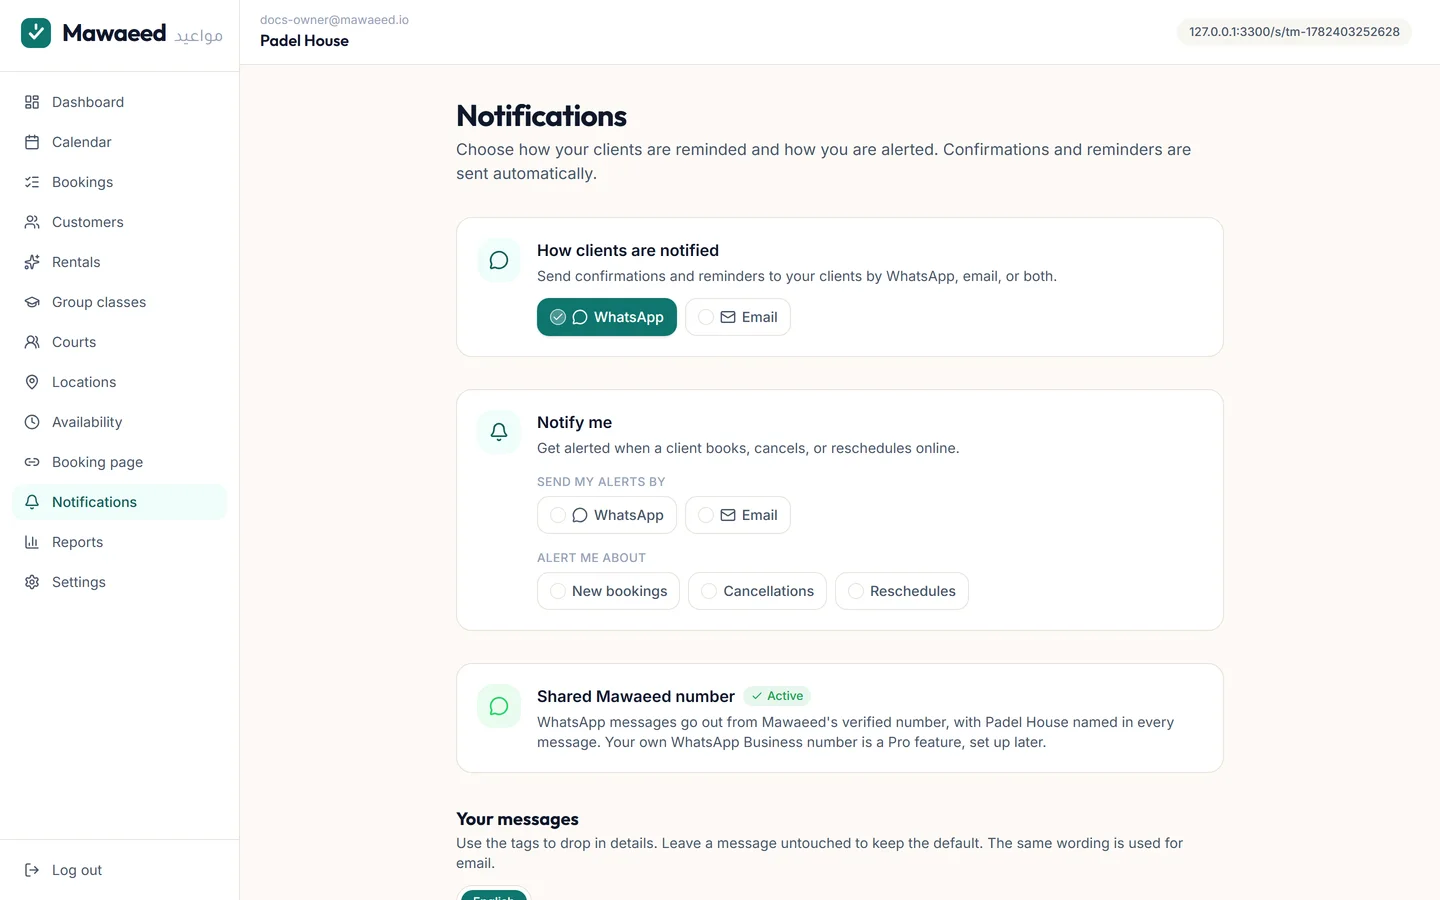
Every booking triggers a confirmation immediately, a reminder 24 hours before, another 2 hours before, and a follow-up after the visit, with your wording, in your customer's language. You get an operator alert on new bookings and cancellations. Configure all of it under Notifications.

Notification and reminder settings

Tips

  • The 24h reminder is the single biggest no-show killer, so leave it on
  • Personalize templates per message under Notifications

Getting paid

Who still owes you, recorded in one tap, with clients able to send proof of a transfer.

1

Your Payments screen

As soon as money can reach you through Mawaeed, a Payments item appears in your menu. It opens on what is actually outstanding: bookings waiting on a deposit and clients carrying a balance, each with the amount already filled in for you. One tap on Received records it, with no typing and no picking a method. Whatever you just recorded sits under "Recently recorded" with an Undo next to it, so a mis-tap costs you one click rather than a support message.

Tips

  • Set up for cash at the venue only, with no Whish number, and this screen stays hidden so your dashboard stays simple
  • Recording money here is the same as marking the booking paid, so your reports never count it twice
2

Let clients send you proof

After booking, and again any time from their manage link, a client can upload a screenshot of their Whish transfer and a reference number if they have one. It arrives on your Payments screen as a highlighted row with a View button for the image and how long it has been waiting. Approve turns it into a recorded payment; Dismiss keeps the record but counts nothing, so an unreadable or wrong screenshot never quietly becomes money.

Tips

  • Nothing counts as paid until you approve it. An unapproved screenshot is just a message with a picture
  • The image stays private to your business and opens through a temporary link

Group classes

Fitness classes, clinics, group lessons: many people, one session, capacity-safe.

1

Create a class with a weekly schedule

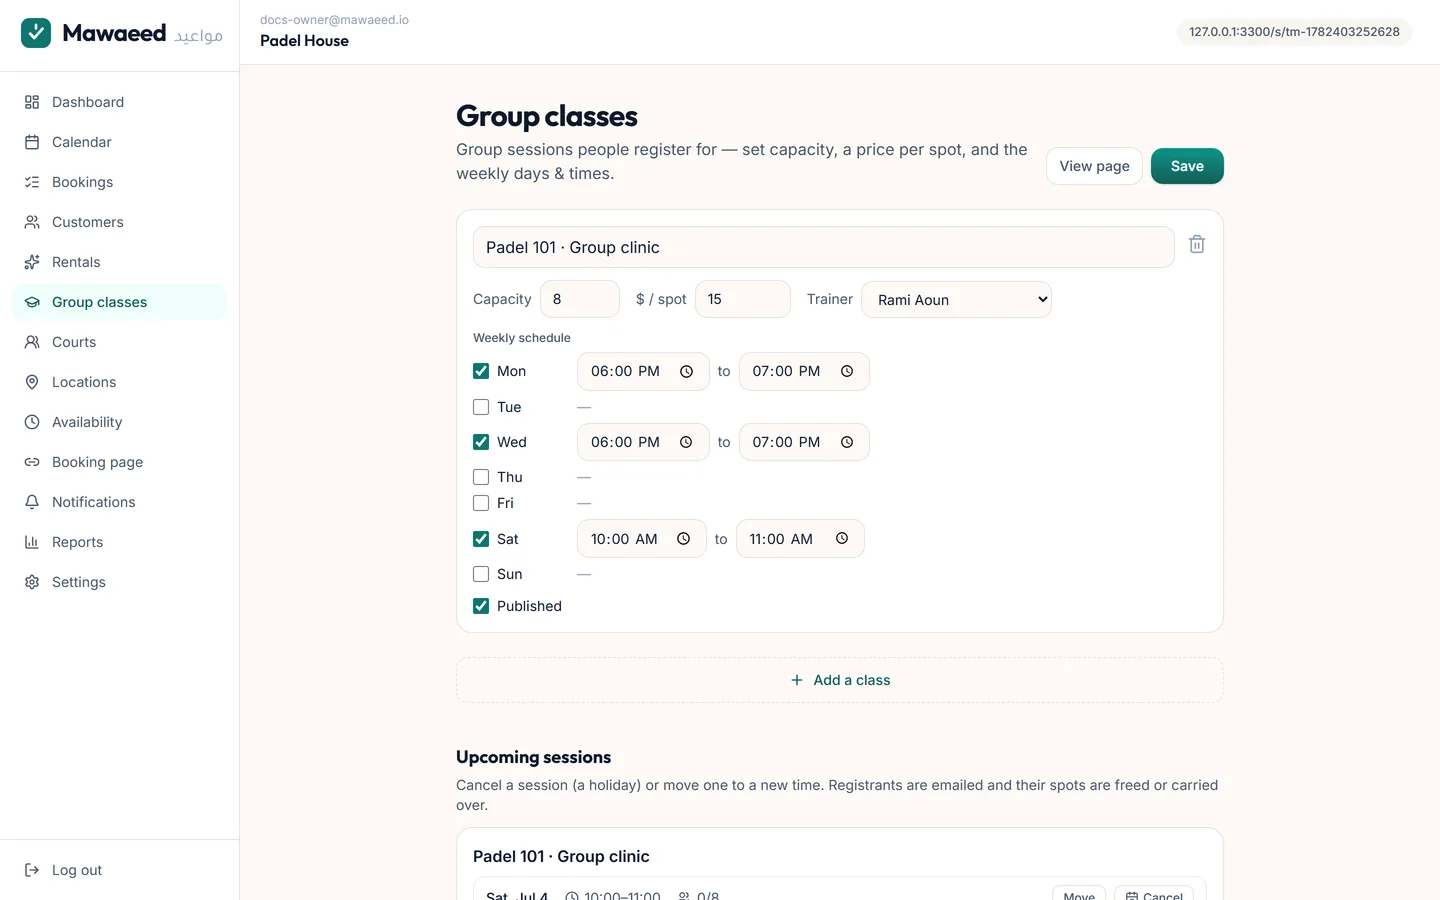
Under Group classes, create a class with a price, a capacity (say 8 spots), an optional trainer, and its weekly schedule (Mon & Wed 18:00, Sat 10:00). Sessions generate automatically every day for the weeks ahead. You never create them by hand. Cancel or move a single session and every registrant is notified automatically.

The group classes editor with weekly schedule
2

Customers register on your timetable

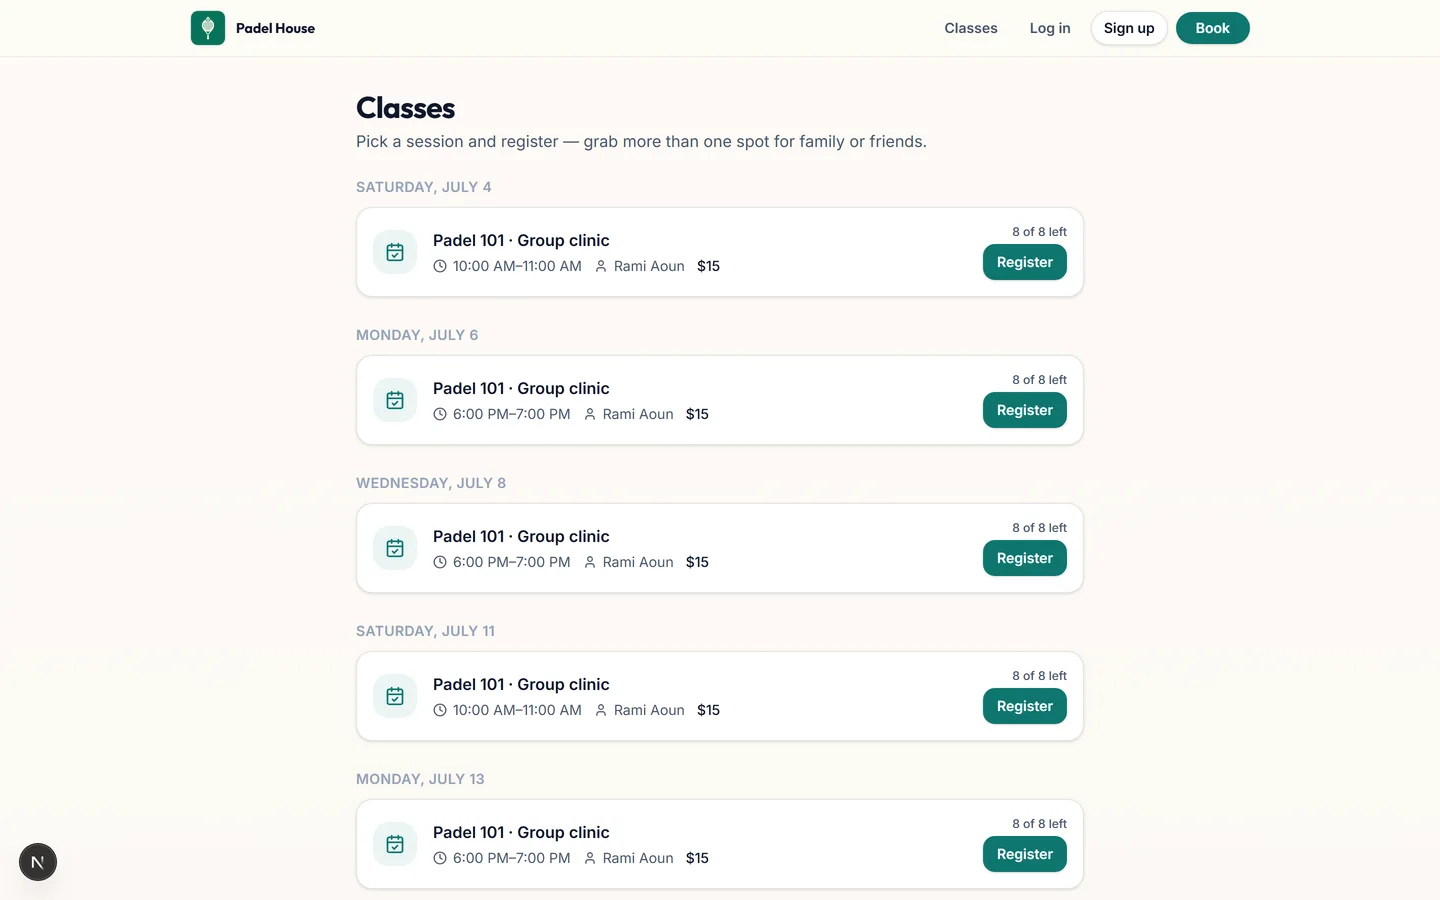
A Classes link appears on your booking page with a weekly timetable. Customers pick a session, choose how many seats, and register. Capacity is enforced down to the last spot even when two people race for it. Spots remaining show live.

The public class timetable with registration

Tips

  • Registrants can self-cancel from their confirmation link, freeing the spot
  • The trainer's calendar is blocked during sessions so 1-on-1s can't collide

Memberships & recurring

Sell plans, track who's paid, and put regulars on a repeating schedule. Perfect for studios, gyms, clubs and clinics.

1

Create your membership plans

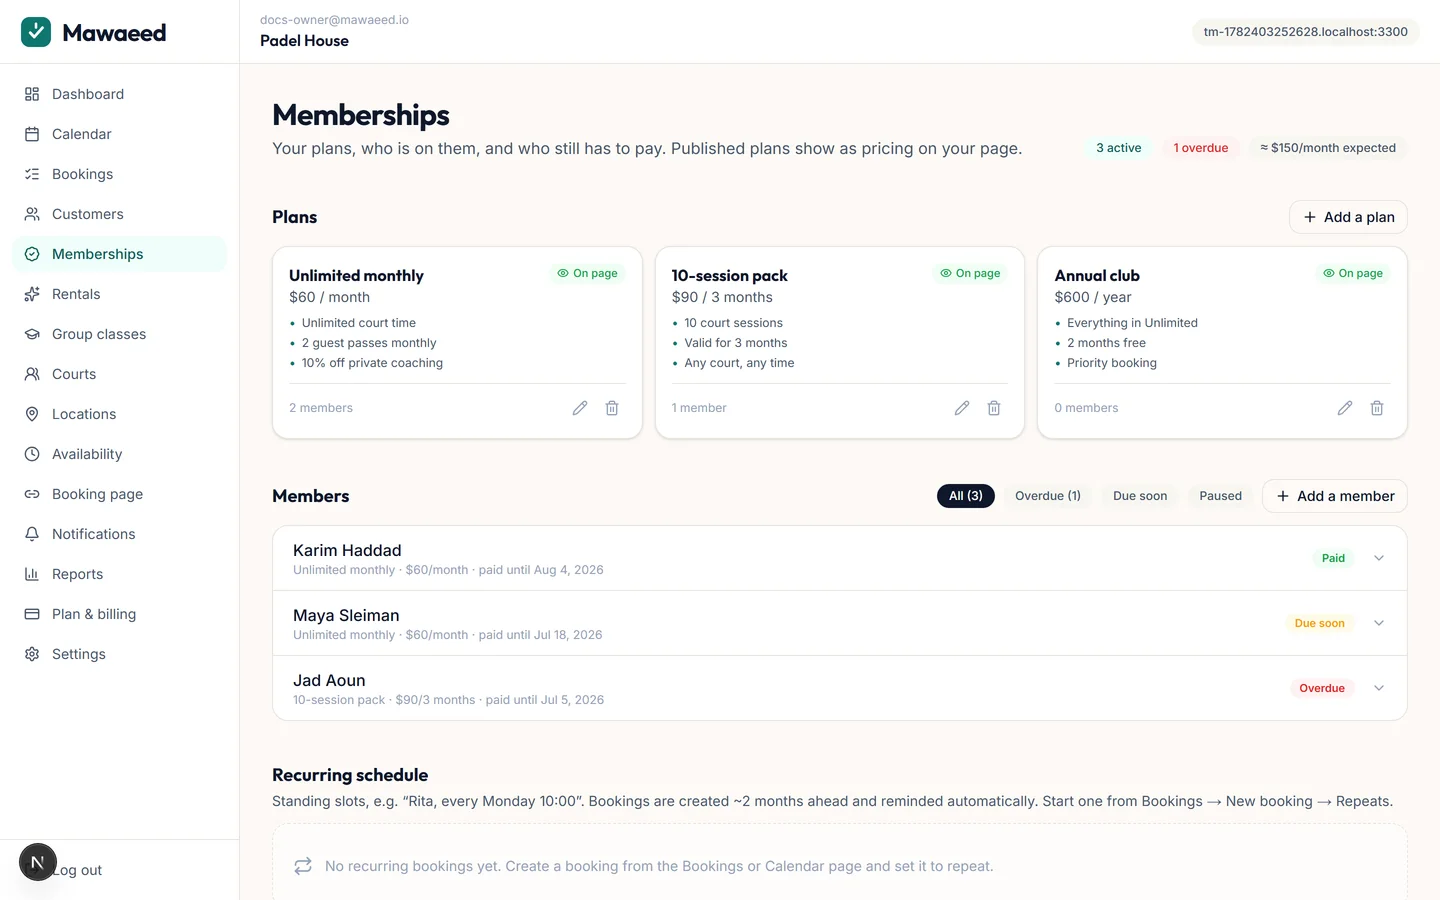
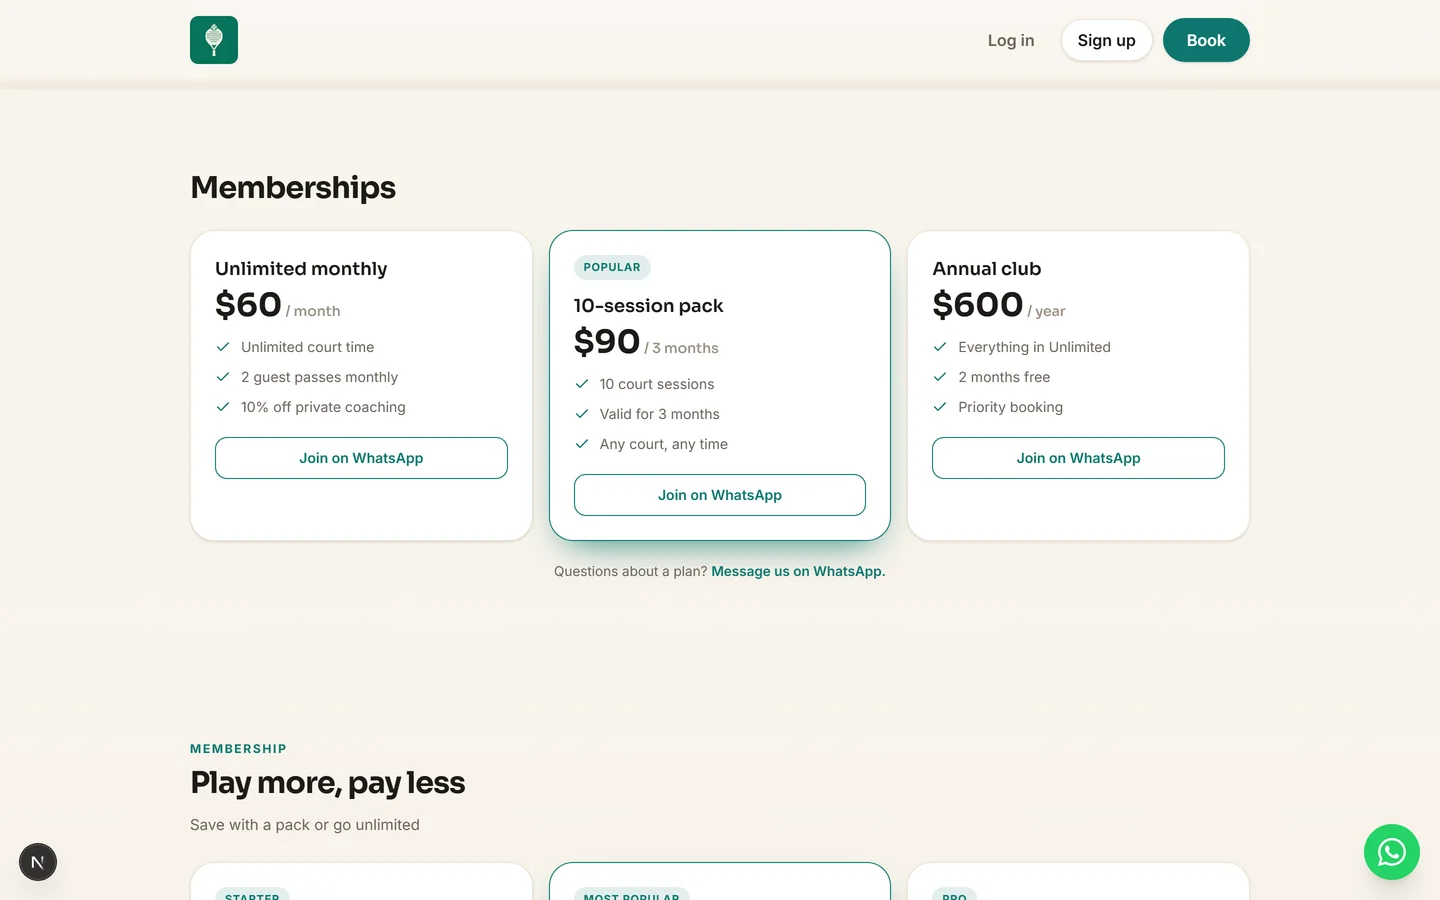
Turn on Memberships in Settings → Features (it's already on for studios, gyms and clubs) and a Memberships item appears in your menu. Create the plans you sell: a name ("Unlimited monthly", "10-session pack"), a price, the period it covers (1 month, 3 months, a year…), and what's included. If the plan includes a set number of visits rather than unlimited use, list each service it covers under "What's included" and say how many sessions: 6 personal training sessions per week, 4 classes per month, or both on the same plan. Flip "Show on my page" and the plan instantly becomes a pricing card on your booking site.

The memberships manager with plans and members

Tips

  • Everything is editable later, so start with your two or three most popular plans
  • The period you pick drives when a member becomes due for renewal
  • Included hours attach to one service on purpose, so a member's personal training allowance never silently pays for something else
2

Add members and record payments

Add a client to a plan (or create a brand-new client right there), then record each payment: how many periods they paid for, the amount, and the method. Their paid-until date recalculates automatically, and every member carries a live status you can filter by: Paid, Due soon, or Overdue. When someone falls behind, one tap opens WhatsApp with a friendly reminder already written.

Tips

  • Every payment is kept as history, and deleting one rolls the paid-until date back
  • The member's plan, status and paid-until also show on their profile in Customers, with Record payment right there
3

Included hours look after themselves

Once a plan carries hours, a member booking that service spends their allowance instead of paying. They see "Covered by your membership" along with how much they have left this week or month, right on the confirmation, and the visit is recorded at no charge. When the allowance runs out the next booking is simply charged as normal, so a keen member is never locked out, and rescheduling checks the same allowance rather than quietly charging twice.

Tips

  • The count resets every week or every month, whichever the plan says
  • Cancelling a covered booking gives the hours straight back
4

Members do not need an account

A member booking with the same phone number you have on their profile is recognised automatically, even as a guest who never logs in. They get the covered price and see their remaining hours without signing in to anything. For most clients, who will never create an account for a gym, this is the difference between the membership working and the membership being ignored.

Tips

  • This is why a member's phone number should be the one they actually book with
  • If someone books with a different number, add it to their profile and the next booking is recognised
5

Put regulars on a repeating schedule

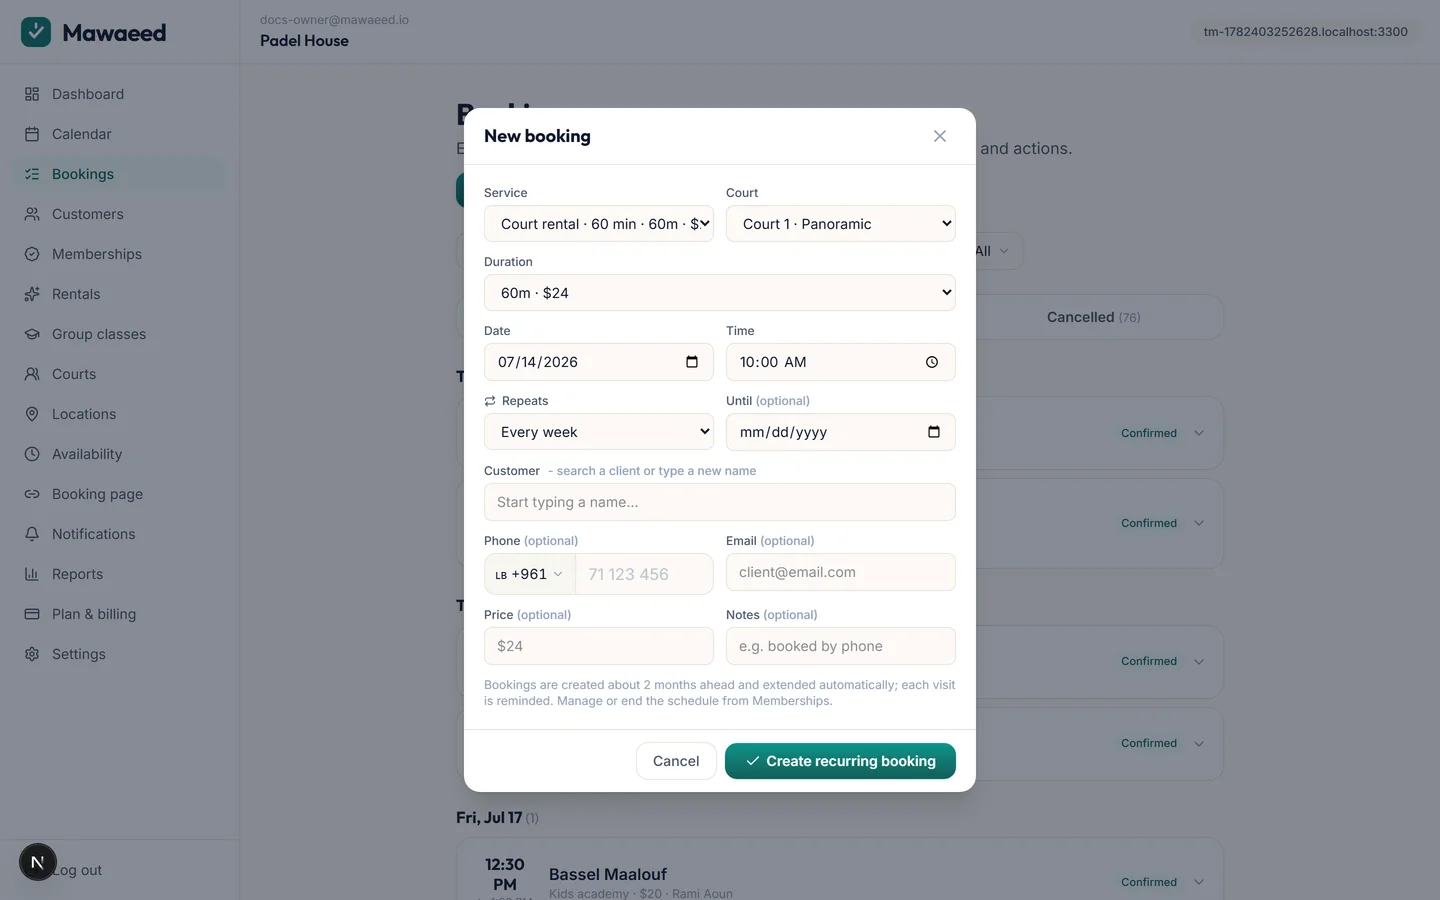
For clients who come on a fixed rhythm (every Tuesday at 6, twice a week), open New booking and choose Repeats: weekly, every two weeks, monthly, or a custom cadence, with an end date. Mawaeed creates every occurrence on the calendar and reminds the client before each one. If the client has an active membership, tick "Covered by membership" and those visits are logged at no charge, so your revenue never double-counts.

The New booking modal with the Repeats schedule open

Tips

  • A repeating series survives reschedules and never resurrects a cancelled visit
  • End a series any time from the Memberships page and all future occurrences are cancelled, with reminders pulled
6

People join straight from your page

Every published plan renders as a clean pricing card on your booking site, and a visitor can join right there with Join online: name, phone, and an email only if you ask for one. No account, no back and forth. The membership starts immediately and appears in your Memberships list as unpaid, so you confirm the money the same way you do for everything else.

The memberships pricing section on a live booking page

Tips

  • New members arrive unpaid on purpose: you decide when the money has actually landed
  • Signed-in clients can join from their account card too, and a join started before logging in survives the login
7

Renewals remind themselves

Three days before a membership is due, and again on the day, Mawaeed emails the member a friendly renewal note in their own language, carrying exactly the payment options you accept: your Whish number if you take Whish, cash if you take cash. Record their payment and the next cycle re-arms itself automatically. Anyone who slips past the date still shows as Overdue in your list, with one tap to open WhatsApp and a message already written.

Tips

  • Reminders go out once per cycle, so recording the payment stops the nagging immediately
  • A renewal email only mentions Whish when you have actually ticked it and filled in a number

Restaurants, rentals & stays

Some industries don't book by the hour, and Mawaeed speaks their language natively.

1

Table reservations (restaurants & cafés)

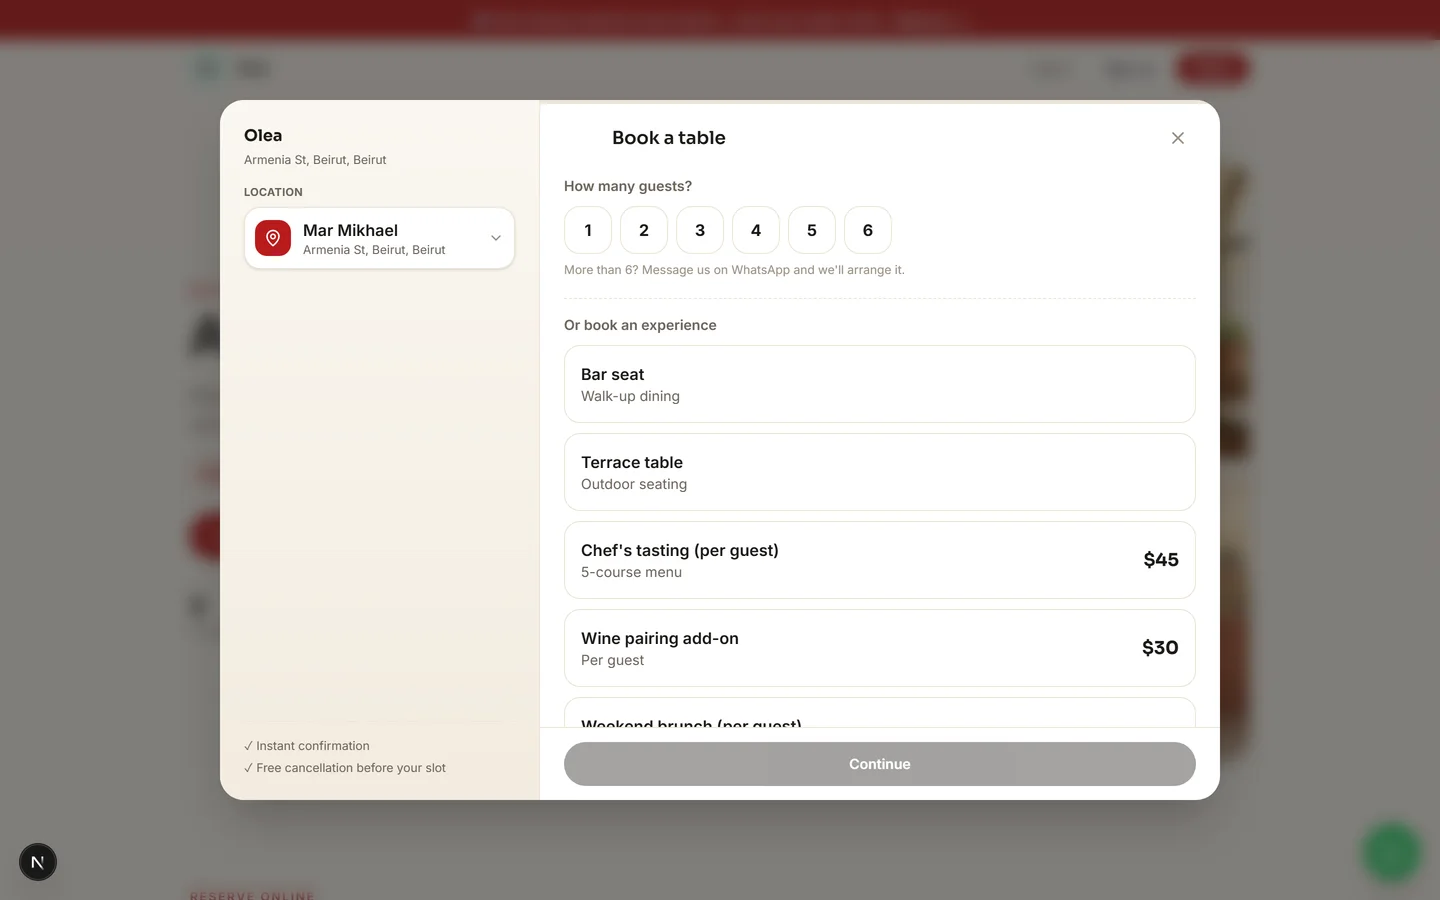
Restaurant pages open the booking modal with "How many guests?". Behind it, your actual tables (2-tops, 4-tops, bar, terrace…) are the inventory: several parties book the same 8pm on different tables, and a couple automatically gets a 4-top when the 2-tops run out. Experiences (chef's tasting, brunch, private room) are bookable right below the guest picker.

The guests-first reservation modal

Tips

  • Deposits on big tables stop no-show groups
  • Guests count lands in the booking notes for your host
2

Publish your menu

Restaurants get a Menu manager: build your categories (Mezze, Grills, Desserts) and add dishes with a price and a photo. A Menu section renders on your page as a clean, categorized menu board, so diners browse exactly what you serve before they reserve. Add, rename, reorder and delete happen instantly; edits to a dish are saved with one Save changes button.

The restaurant menu manager with categories and dishes

Tips

  • A dish photo makes the menu board look like a real menu, not a list
  • Diners read the menu, then reserve a table with the guests picker at the top of the page
3

Car rental by date range

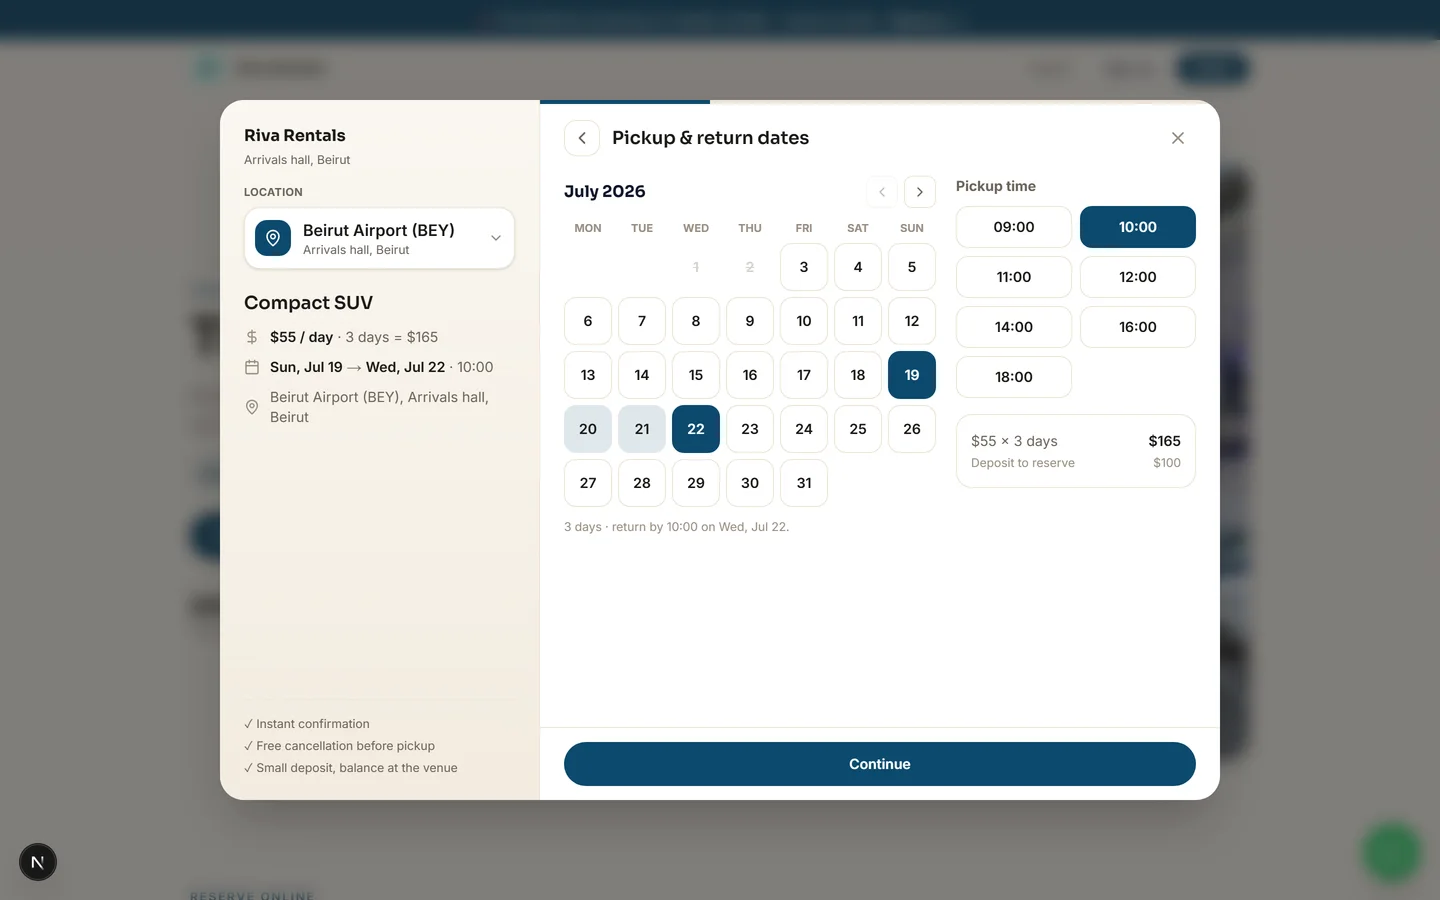
Rental pages sell by the day: the customer picks a car class, then a pickup date and a return date on the calendar. Sold-out days are struck through per class, prices multiply by the number of days, and each physical car in your fleet is tracked so a class sells out only when every unit is on the road. A car returned at 10:00 can go back out the same morning.

The pickup-to-return date range picker

Tips

  • Weekly rates and chauffeur services live in the same list
  • The deposit holds the car; the balance is settled at pickup
4

Guesthouses & stays by the night

Guesthouse pages speak hotel: guests pick a place, then check-in and checkout dates, and the price multiplies by the number of nights. Each property keeps its own availability calendar, so booked nights are struck through per place, and a room that checks out in the morning can welcome new guests the same day. List each property as a service with photos and the showcase layout does the rest.

Tips

  • Use the photo showcase services layout so each place sells with its pictures
  • The deposit secures the stay; the balance is settled at check-in

Customers & reports

Know your regulars and read your numbers.

1

The customer directory

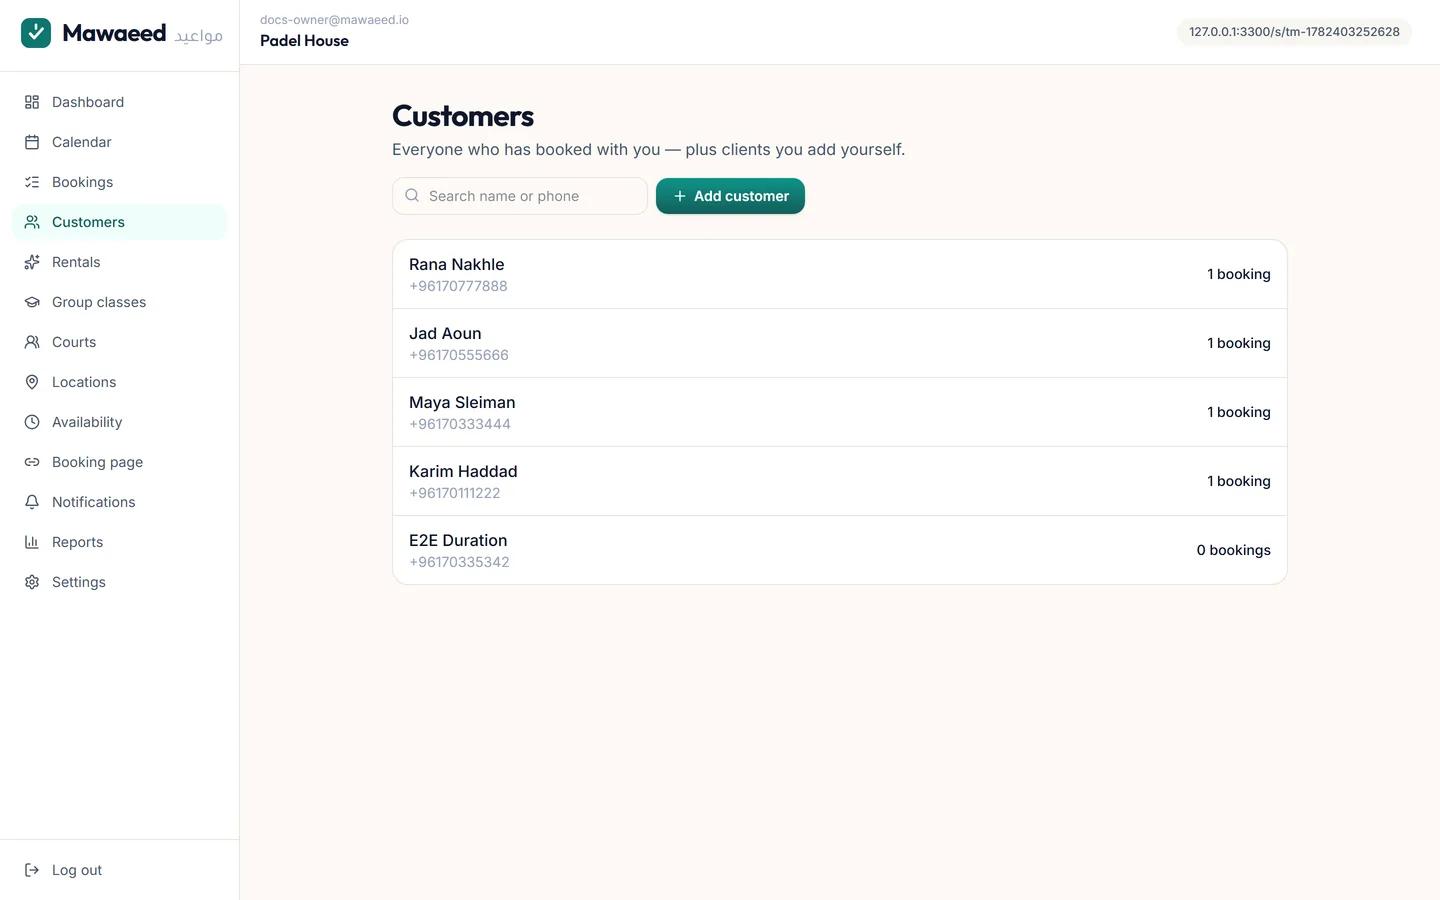
Every person who books lands here automatically with their booking history, spend, and no-show count. Add customers manually, edit their details, and keep notes ("prefers coach Lara", "allergic to nuts"). One profile per phone number, so repeat clients are recognized on every future booking.

The customer directory
2

Erase or delete a customer

Two different things, deliberately kept apart. Erase is for a client who asks you to remove their data: their bookings and totals stay in your records, while the name and contact details are gone for good. Delete completely is for the test records you created while setting up: the person and their bookings are removed entirely. Both make you type a word first, and Delete completely asks a second time.

Tips

  • Erase for real people making a real request, Delete completely for your own test data
  • Neither can be undone, which is exactly why the typed confirmation is there
3

Clients get their own account

Clients can create an account right on your booking page (or continue as guests, an account is never required). Signed in, they see their upcoming and past bookings with you, can cancel or rebook within your rules, and their name and WhatsApp are pre-filled on every future booking.

Tips

  • Guest bookings still get a manage link by email, so self-service works either way
4

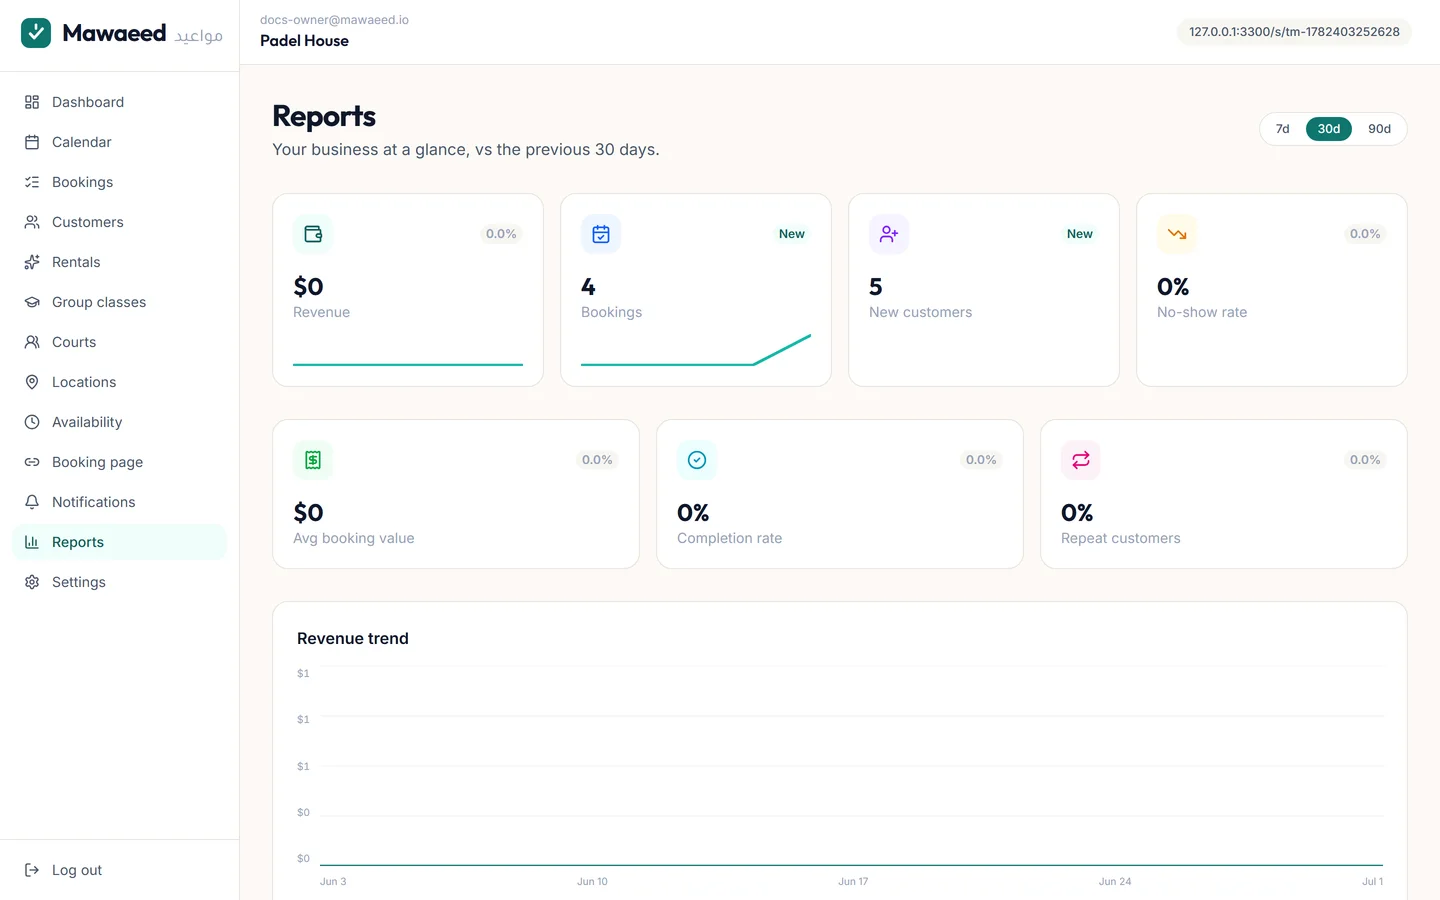
Reports

Revenue over time, bookings per service and staff member, busiest hours, new vs returning customers, and no-show rates. Pick 7/30/90 days and see how the business is actually doing.

The reports page with charts

Settings & billing

Policies, payments, wording and your plan.

1

Tune your policies and wording

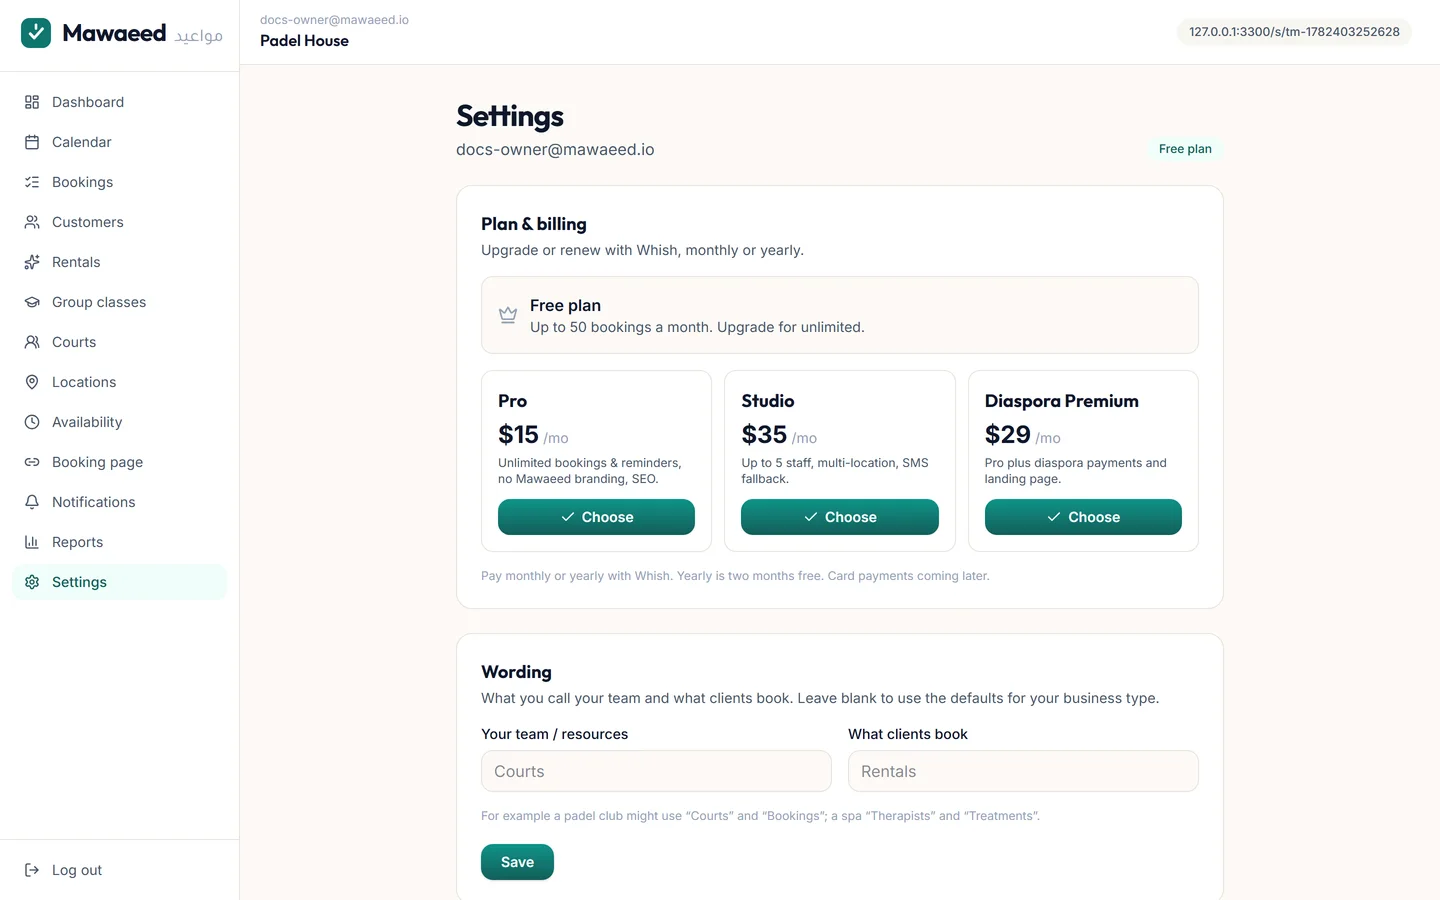
Settings holds your business profile and social handles (Instagram, TikTok, Facebook), booking rules (minimum notice, how far ahead people can book), deposits and cancellation windows, your Whish payout details, calendar connections, and the Wording panel that renames things to match your world: "Staff" becomes "Courts", "Services" becomes "Treatments". Booking policy also carries one quietly important choice: whether to ask clients for an email address at all. Untick it and people book with just a name and phone number, which suits businesses whose clients simply do not use email, and those bookings get WhatsApp reminders instead of email confirmations.

The settings page
2

Change your booking link

Settings → Your booking link renames the address clients use, so iron-fitn.mawaeed.io can become iron-fitness.mawaeed.io. Type the new name, confirm, and the new address works immediately. Your old address keeps forwarding to the new one for 30 days, which is your window to update your Instagram bio, your WhatsApp messages, your printed cards and any QR code you have out in the world.

Tips

  • Use those 30 days: once the forwarding expires, the old address stops working
  • 3 to 40 characters, lowercase letters, numbers and hyphens
3

Switch on the tools you need

The Features card keeps your dashboard simple: optional tools like Group classes and Locations stay hidden until you switch them on, and you can rename how they appear in your menu ("Classes" becomes "Clinics", "Locations" becomes "Branches"). Your industry template pre-selects sensible defaults, so most businesses never think about this.

Tips

  • Turning a feature off hides it from your menu and your public page. Nothing is deleted
4

Plans

Every new business starts with 30 free days of the plan it chooses (Starter, Pro, or Studio), applied automatically at signup. When you're ready, pay by Whish transfer (confirmed within the day) and your plan renews from your dashboard.

Tips

  • Everything in this guide except branding removal works on the free plan while you get set up
  • The free 30 days let you launch on your chosen plan and see real bookings before deciding

ابدأ باستقبال الحجوزات اليوم

مجاناً لـ 25 حجزاً شهرياً. جاهز خلال خمس دقائق. بدون بطاقة.

ابدأ مجاناً

لديك حساب؟ سجّل الدخول